If you are coming from Darling & Dapper, welcome!
This post is part of a 4th of July blog hop hosted by Kippi of Kippi at Home! So make sure to check out the other posts at the bottom of this one.
This post may contain affiliate links. This means that if you purchase from one of these links I will make a small commission, but rest assured you will not pay more for any products.
- Cricut Maker or Cricut Explore Air 2 or Cricut Joy
- Surge Protector
- StandardGrip Mat
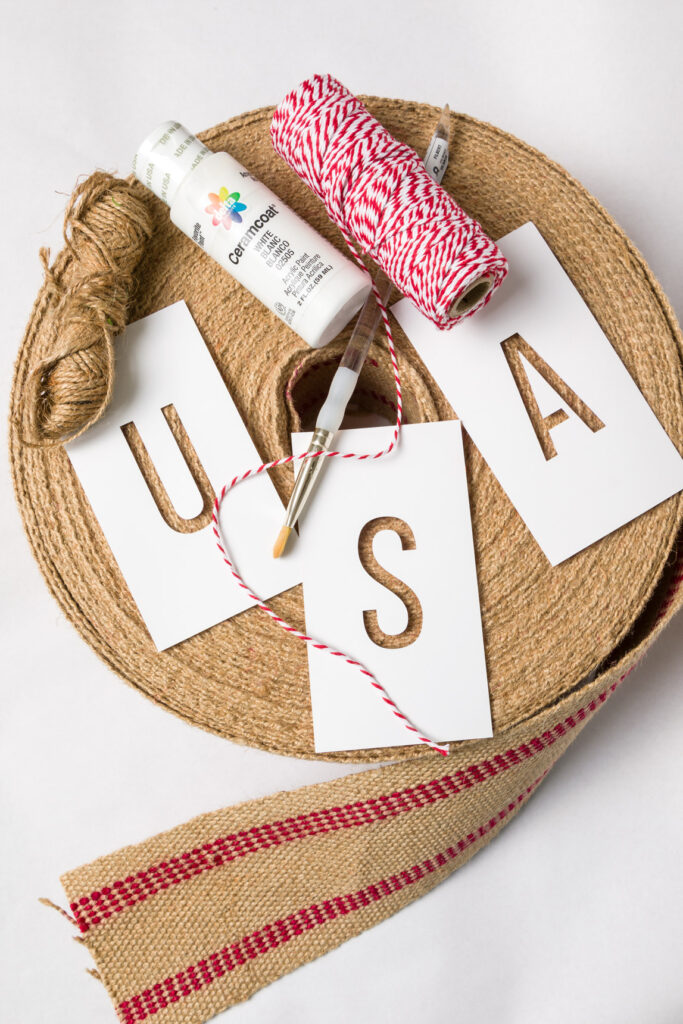
- Medium Cardstock
- Craft Paint – White
- Sharpie Paint Marker
- Jute Webbing
- Jute Twine or Baker’s Twine
- Scissors
- Hot Glue Gun
- Mini Clothespins
- Ribbons
- Stencil File
Craft With Us was created to help us with our Cabin Fever. We were feeling a little isolated and needed some “girlfriend time” so what better way than to invite you to join us online to craft together? So you don’t miss anything be sure to join our VIP list and get crafting classes delivered straight to your inbox HERE.
Tuesday crafting events will be held every Tuesday at 2 p.m. live on our Kippi at Home Facebook page.
Crafting Classes
DIY USA Banner – Tuesday 2 p.m. CST
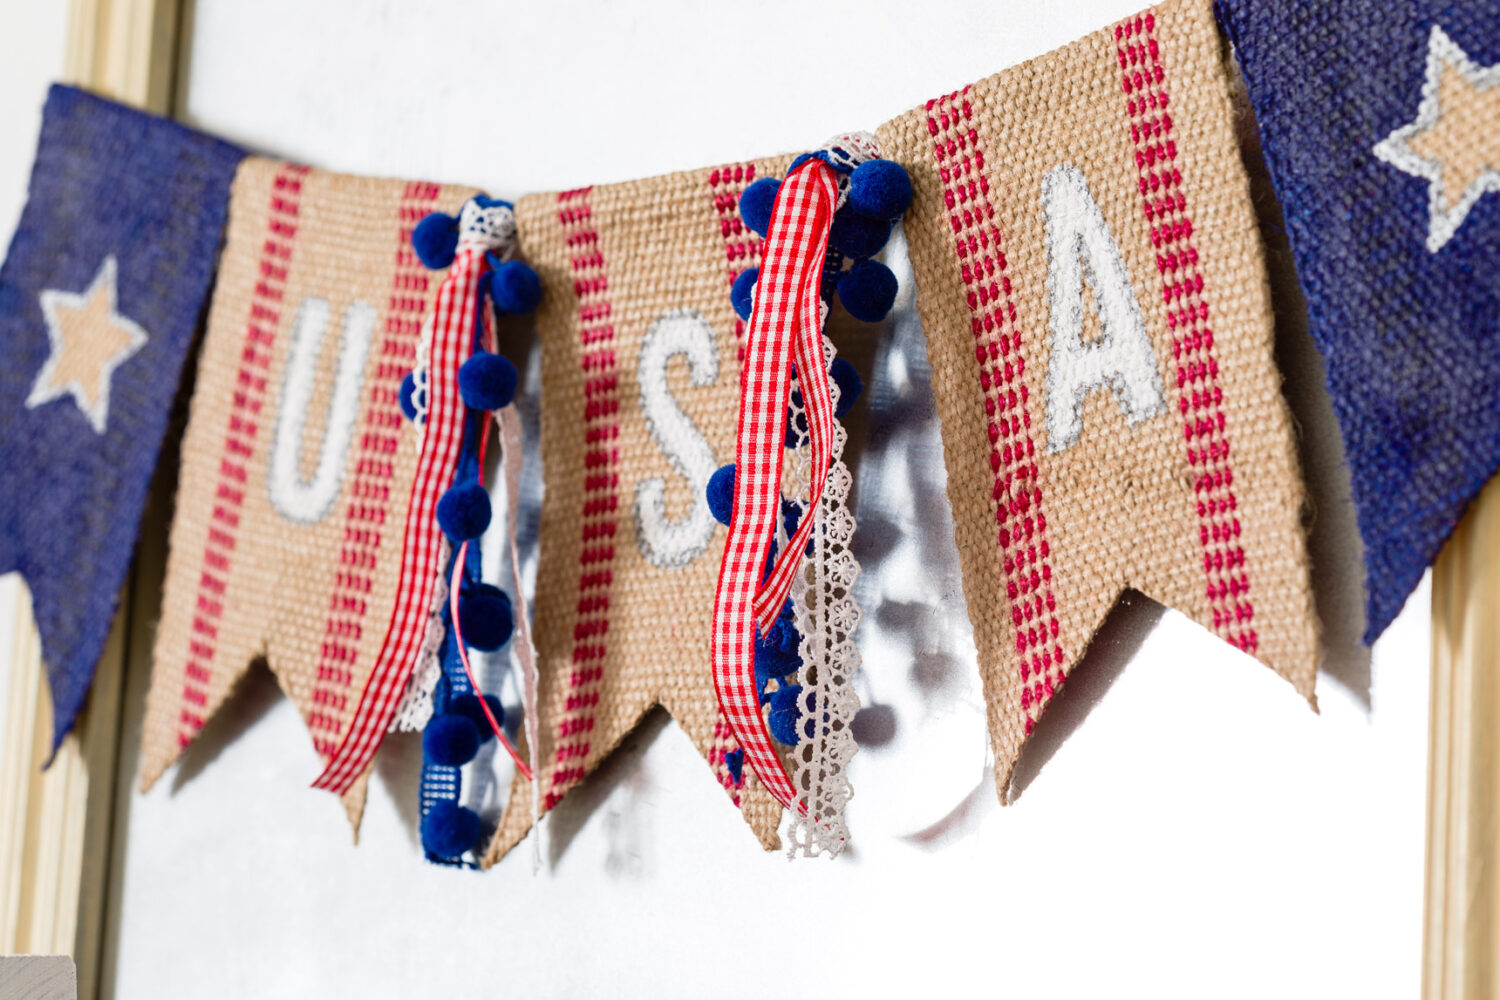
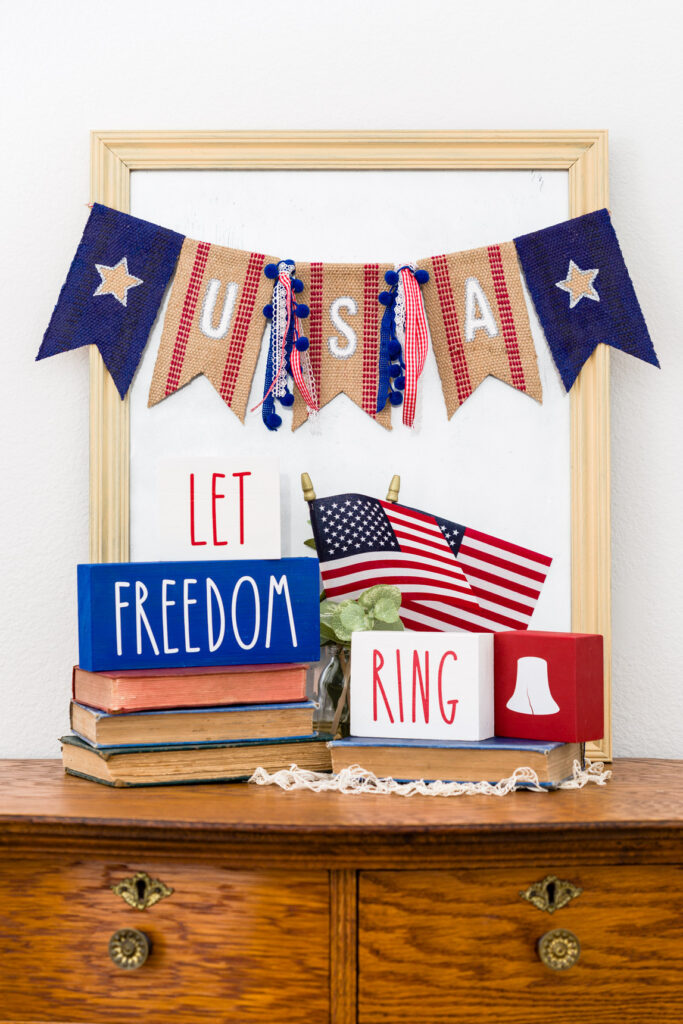
Let’s craft an easy USA Banner together. This banner can be made with burlap, fabric, ribbon or cardstock paper (paper plates can work too), so grab what you have on hand and let’s craft together.
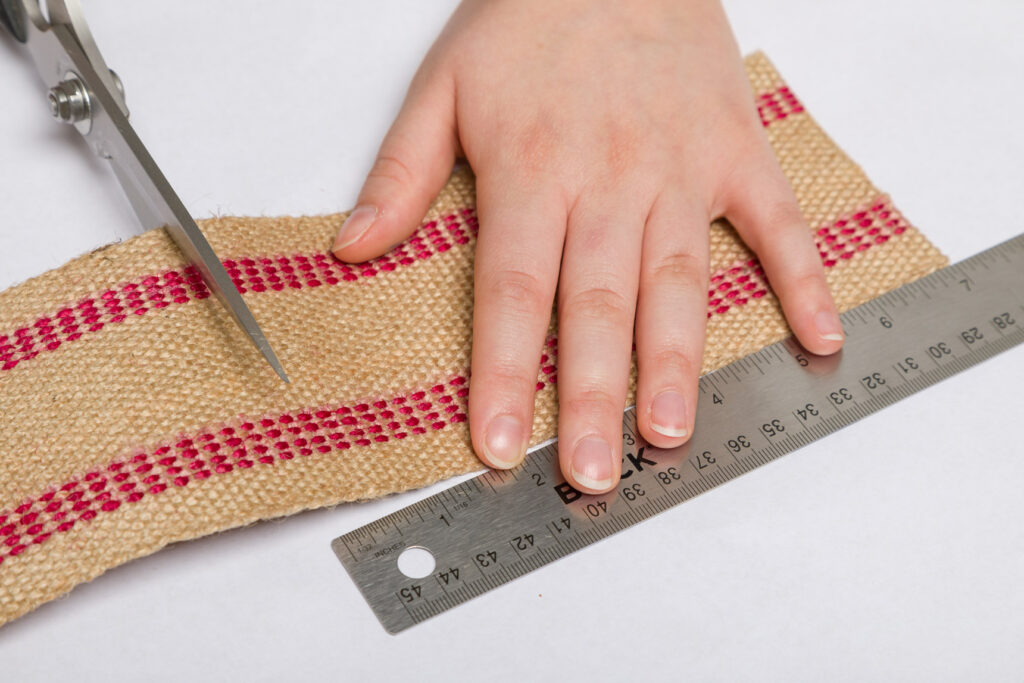
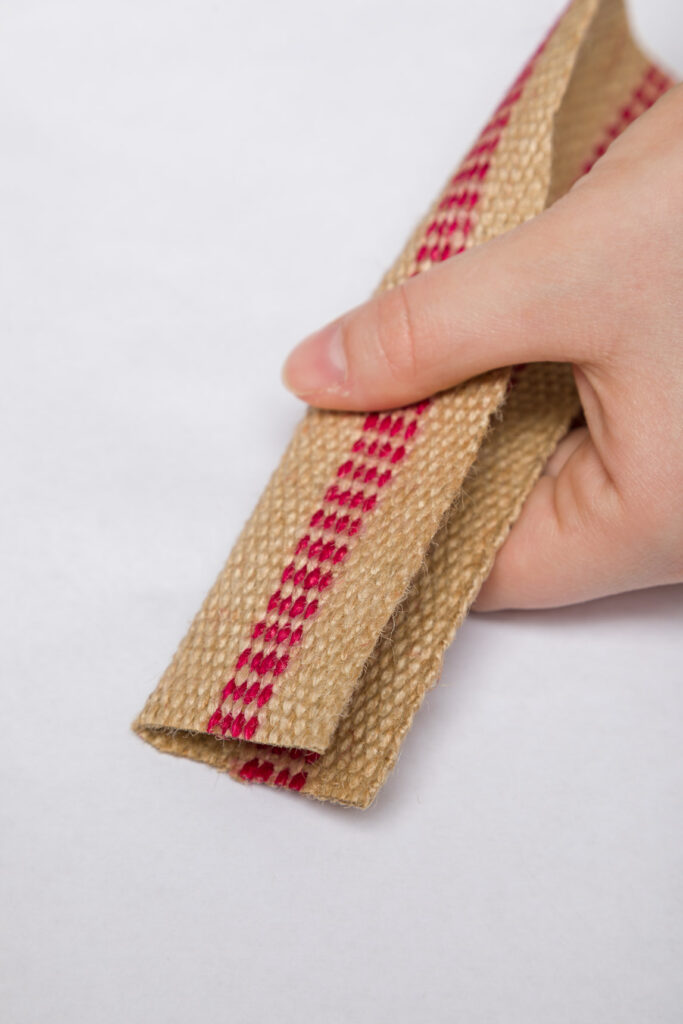
Cut 5 pieces of the jute webbing at 7 inches long.
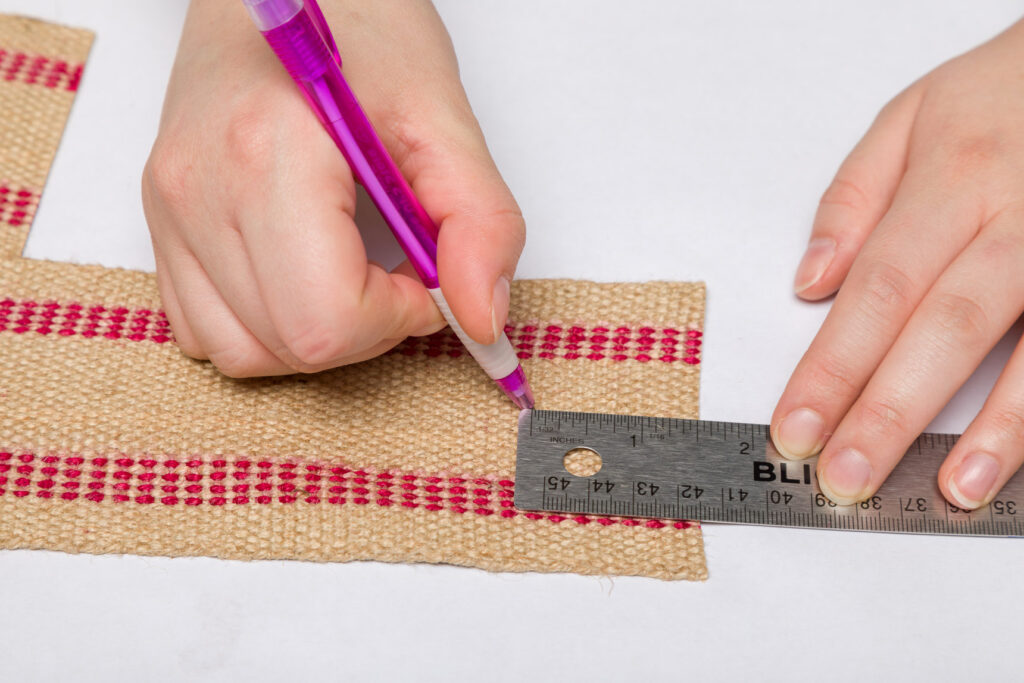
First, mark 1.5 inches up from the bottom in the center.
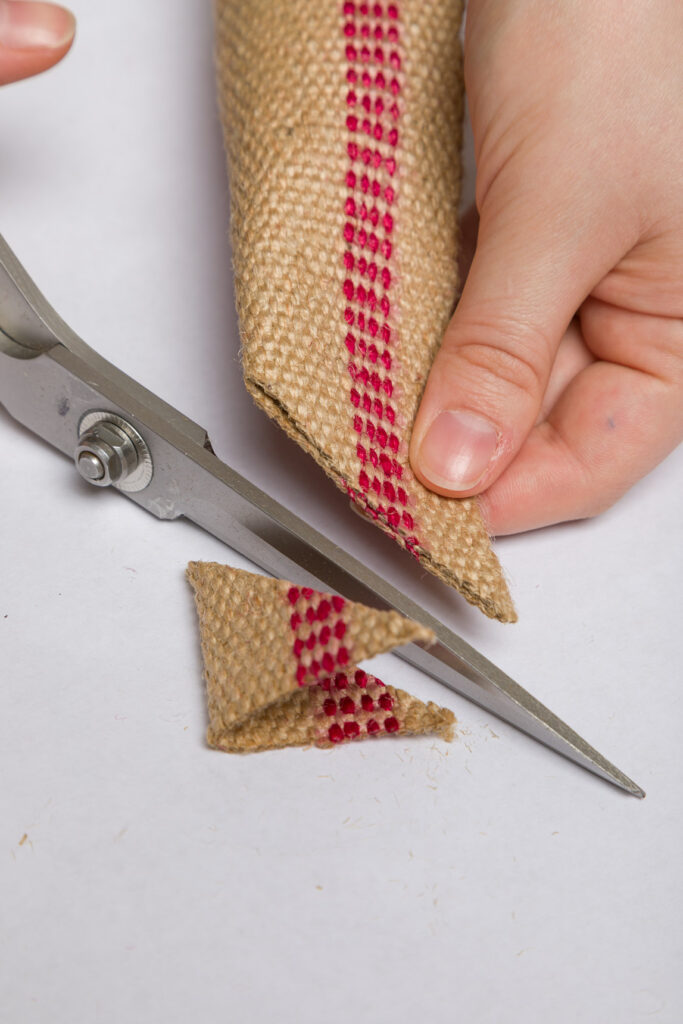
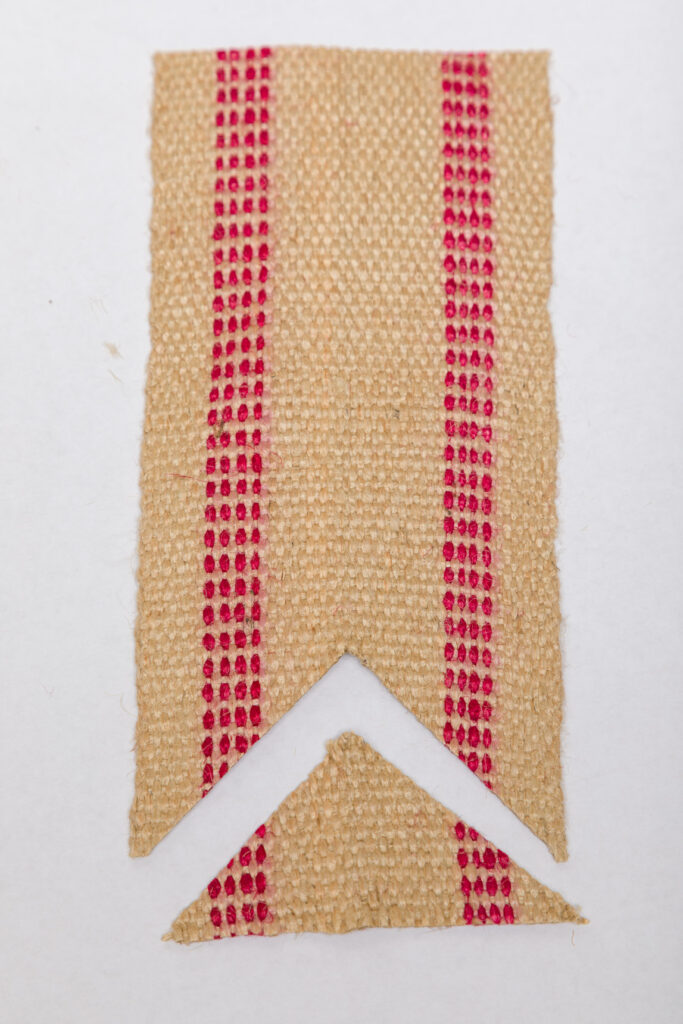
Then fold the piece in half longways and cut from the inside mark to the outside corner, cutting out a triangle.
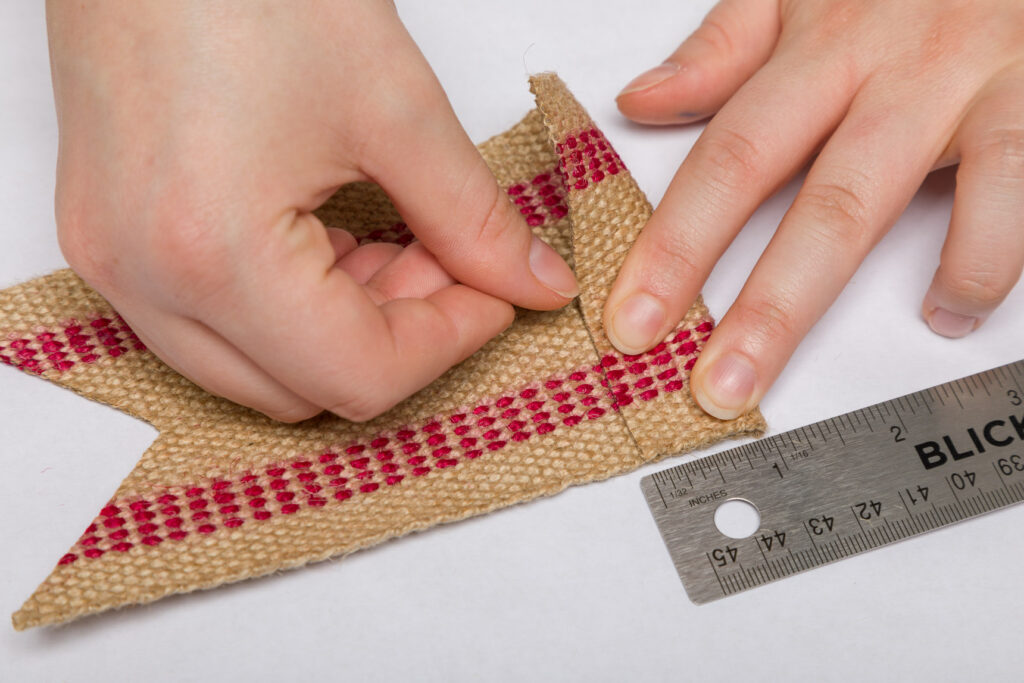
At the top fold over one inch to the back.
Cut out stencil pieces for “U”, “S”, and “A” out of card stock, I used my Cricut Maker. I also used my Cricut to cut the stars out of vinyl.
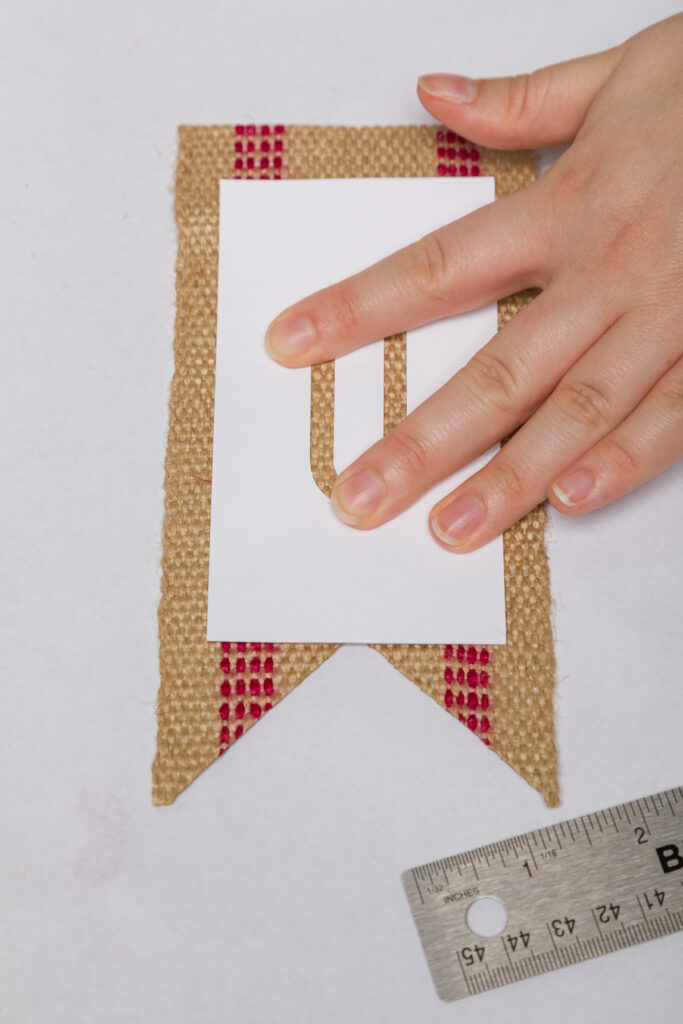
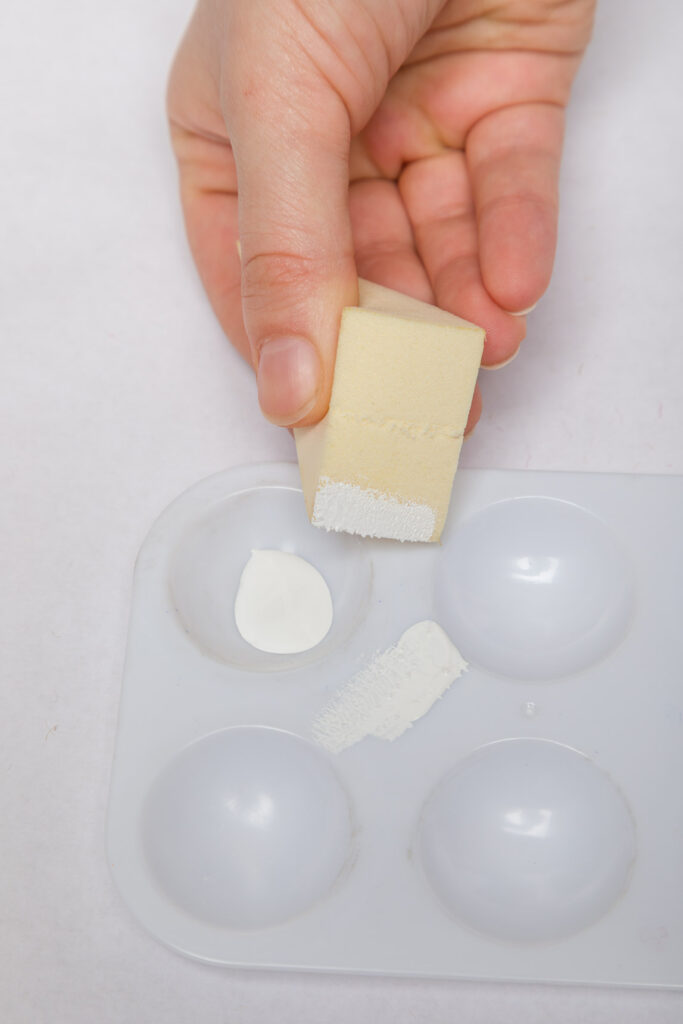
Use a paintbrush or sponge with white paint for the letters. First, center each stencil on the webbing and hold in place.
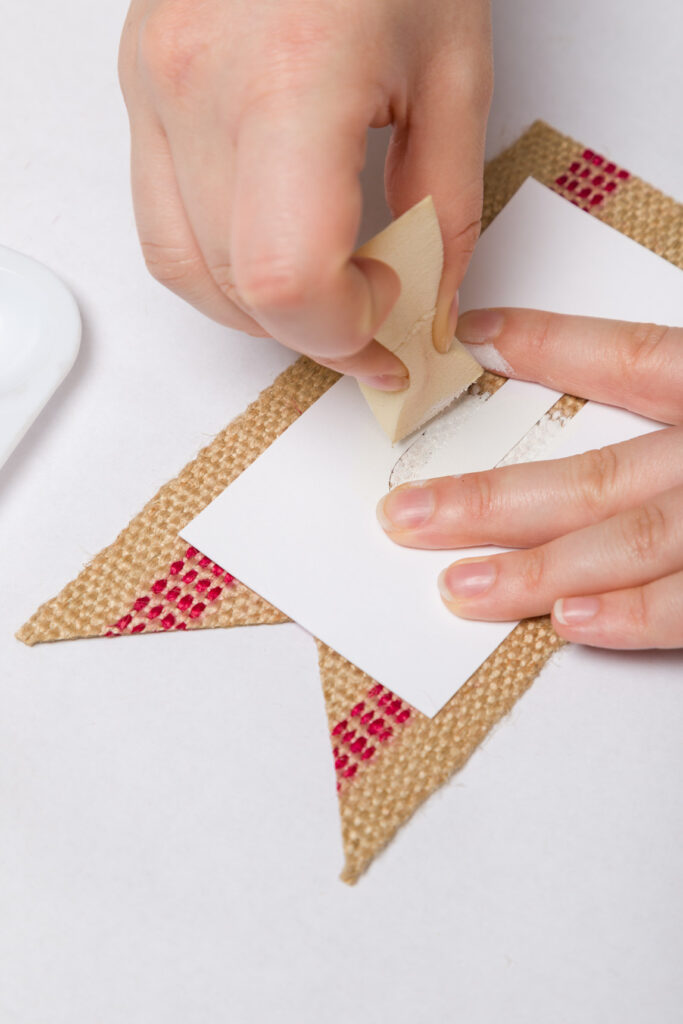
Lightly dab or paint on top of the stencil. While working from the edge toward the center to minimize paint bleeding.
For the stars I suggest using a brush with blue paint. Start from the center and work your way out.
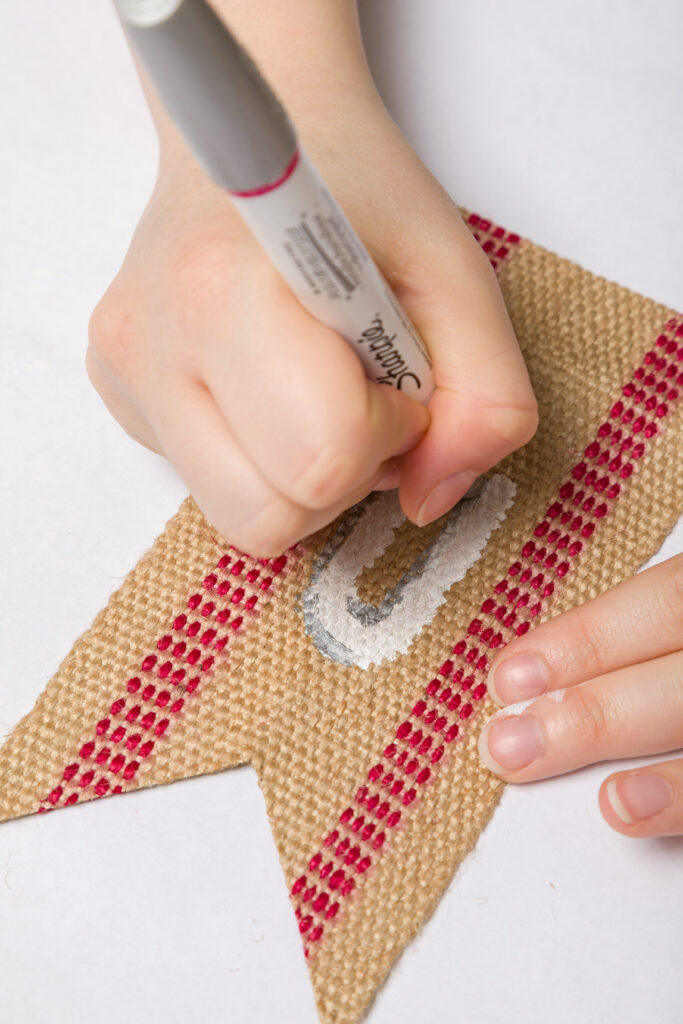
Sometimes paint bleeding is inevitable, but here’s a solution! I used a silver paint marker and drew around the edge of the letter to even things out and make it pop.
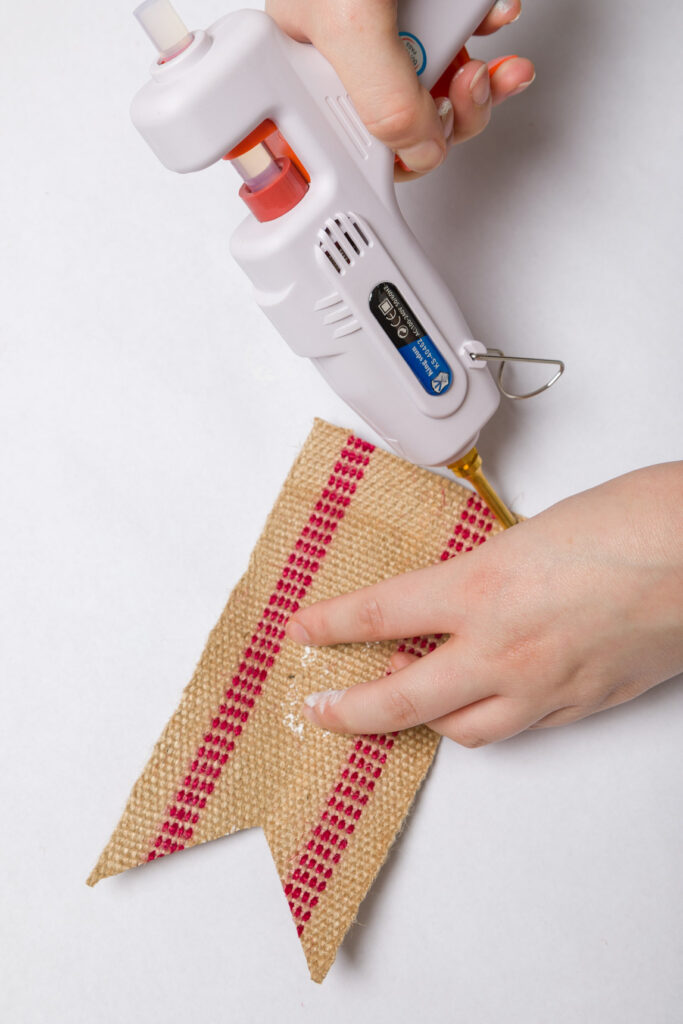
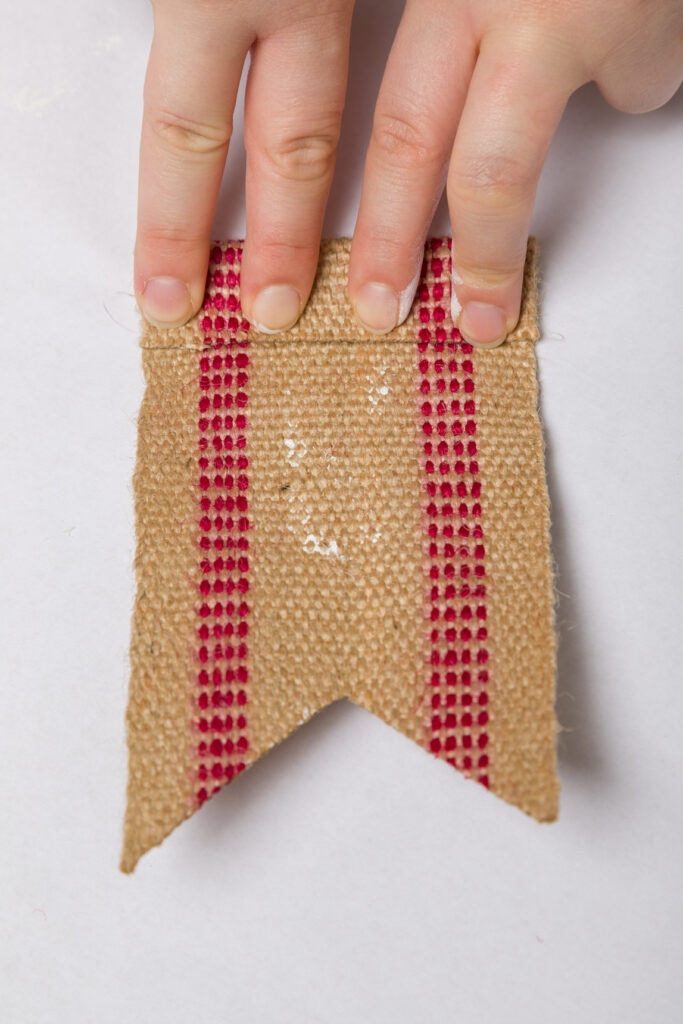
Once the paint is totally dry, flip over the banner piece to the back and put down a string of hot glue near the top edge. Then fold it over on that 1 inch crease and hold for thirty seconds to secure it.
Then you can thread whatever you are using to hang it through the pocket. For this banner I used two types of twine twisted together for mine.
Leave some space between the letters so you can add some extra flair. Finally, I cut three different ribbons into two 12inch pieces and used a lark’s head knot to attach them to the banner.
Next on this blog hop we have Kippi of Kippi at Home and her super cute mason jar lights!


Kippi at Home // House on Silverado // Sonya Burgess // Zucchini Sisters

🇺🇸 🇺🇸 🇺🇸 🇺🇸 🇺🇸 🇺🇸 🇺🇸

My Family Thyme // A Life of Balance // From Farmhouse to Florida // Peacock Ridge Farm
🇺🇸 🇺🇸 🇺🇸 🇺🇸 🇺🇸 🇺🇸 🇺🇸

This Dear Casa // Feet Under My Table // Darling & Dapper Life // Olivia O'Hern

4th of July Party Ideas | DIY Decorations How To | Olivia OHern
Sunday 30th of May 2021
[…] 4th of July USA Banner 4th of July Wood Block Signs 4th of July Rocket & Firecracker Ideas […]
Rebecca
Wednesday 26th of May 2021
Olivia, your banner is so festive and patriotic! I love the lace, pom pom and gingham ribbon. Your trick for covering up bleed through is genius! Thanks for the great tutorial. I love crafting with burlap, so this is right up my alley! It was fun hopping with you :)
Sonya
Saturday 22nd of May 2021
Great idea and tutorial, I have some blue jute webbing I can use. I think I might give this one a try. So happy to be hopping with you.
Niky
Saturday 22nd of May 2021
Super cute, Olivia! I love how detailed your instructions are! This is so easily customized and versatile! I've pinned it to my July 4th Crafts board! Niky @ The House on Silverado
Lynne
Saturday 22nd of May 2021
Olivia, I love this fun and festive banner! I have never used my Cricut to make stencils. Thank you for sharing...I now will give it a try. Your step by step tutorial is so helpful and your solution for paint bleeding is genius. Pinned!