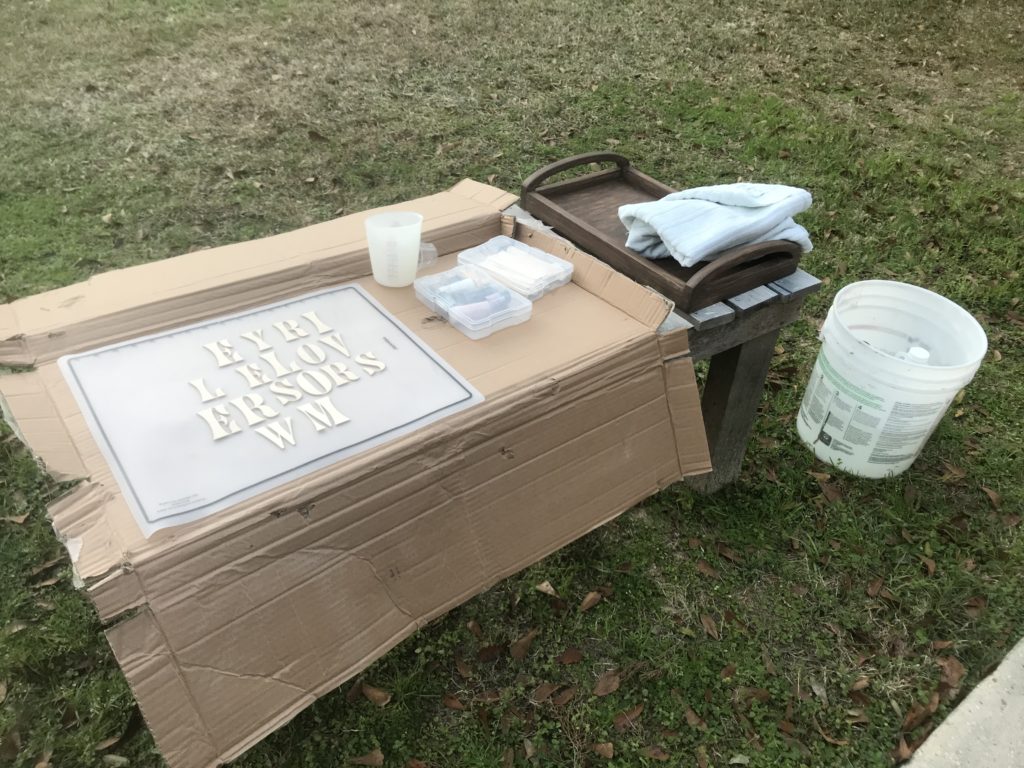
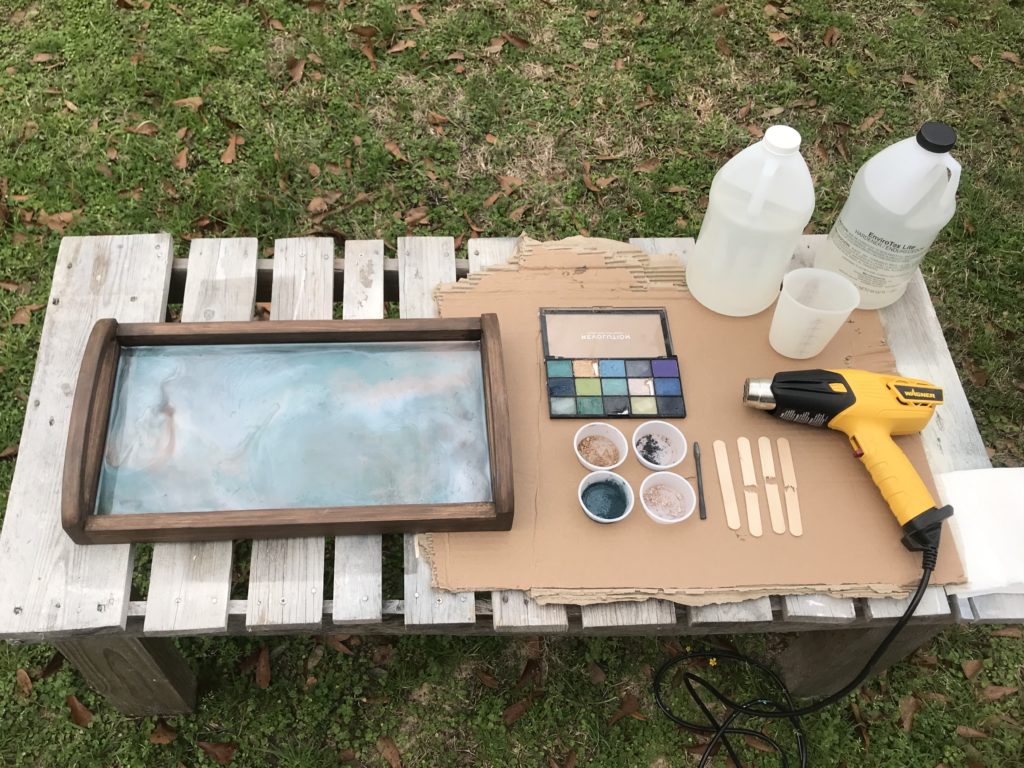
Supplies:
- Cricut Maker
- Surge Protector
- Strong Grip Cricut Mat
- Cricut Knife Blade and Housing
- Pour-On Resin High Gloss Finish Envirotex Lite
- Basswood
- Masking Tape
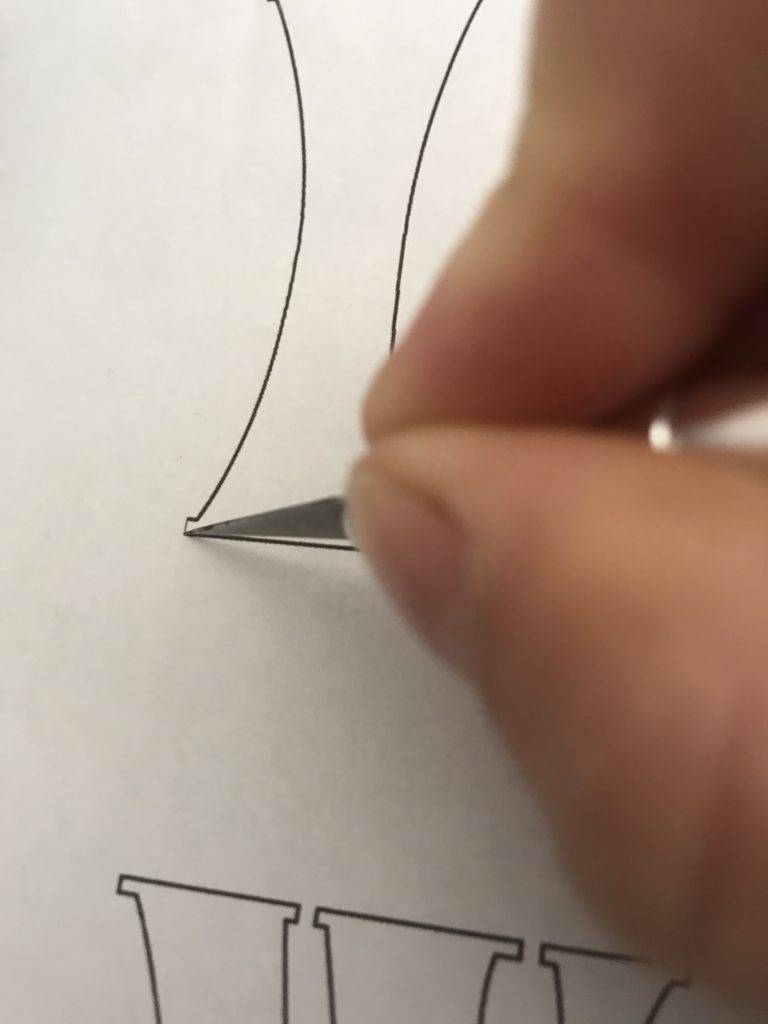
- X-Acto Knife
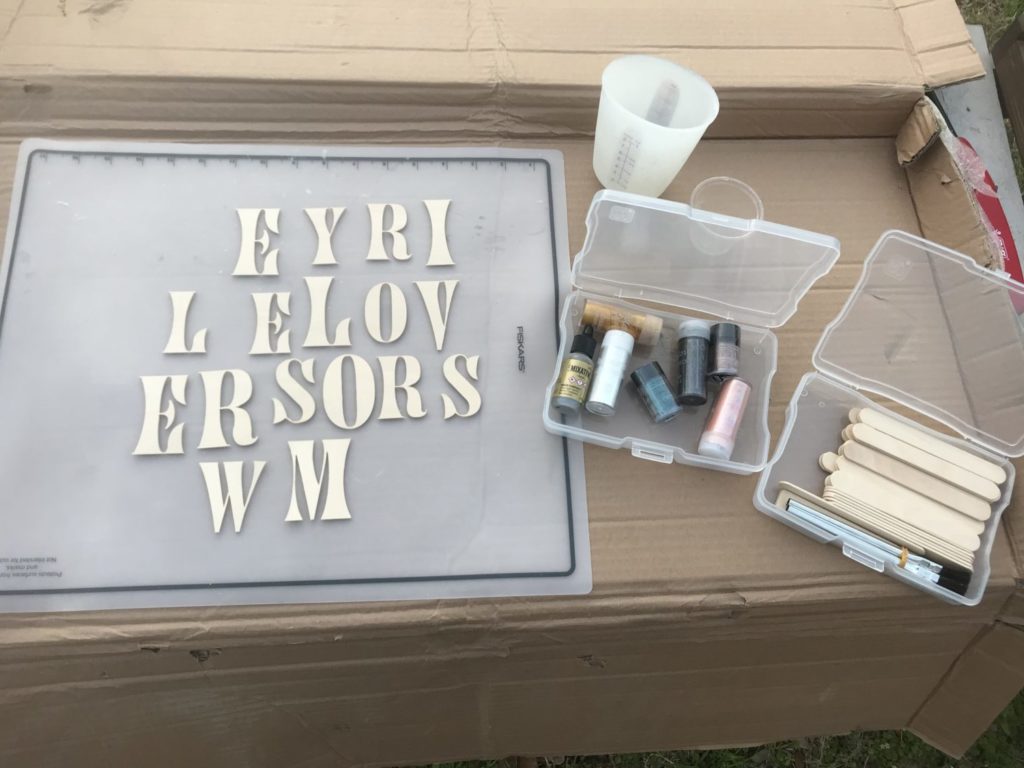
- Mica Powders
- Opaque Dye
- Makeup Revolution Eyeshadow Palette, Reloaded Deep Dive
- NYX Pigments PIG24 – Peacock
- NYX Pigments PIG06 – Stunner
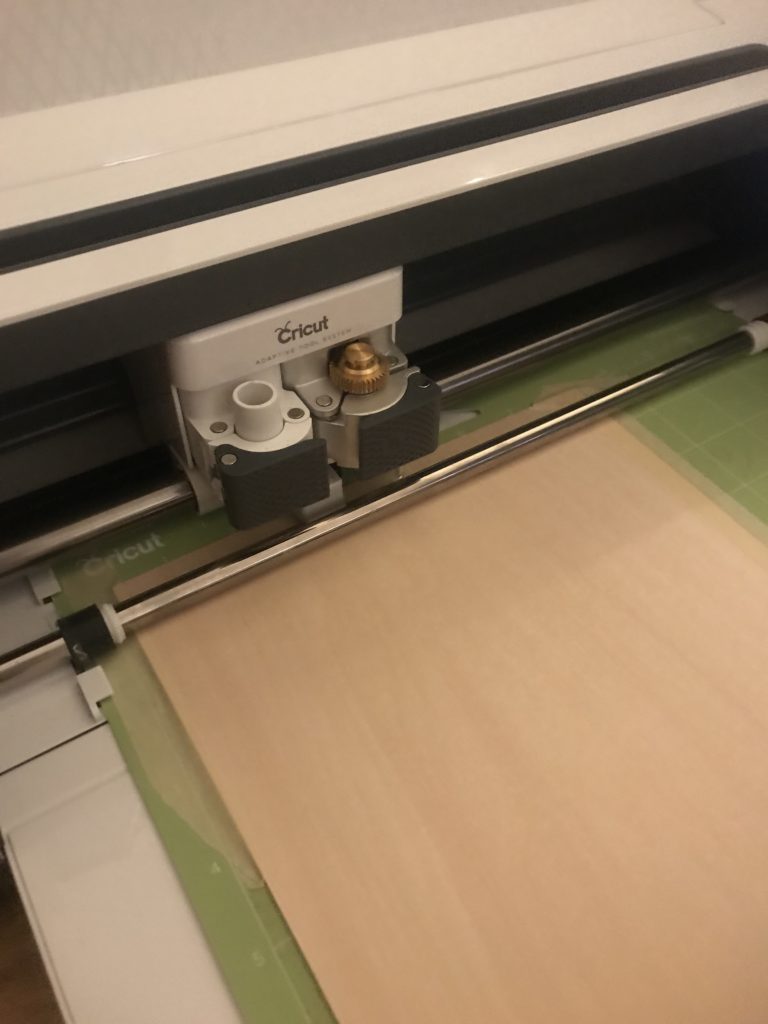
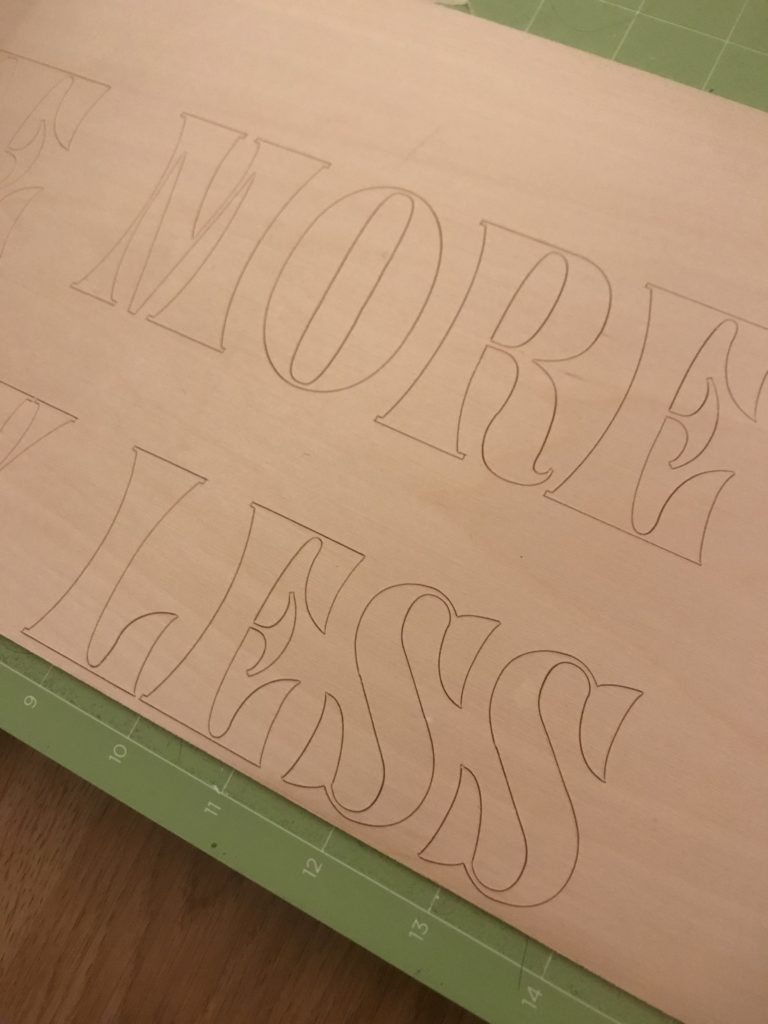
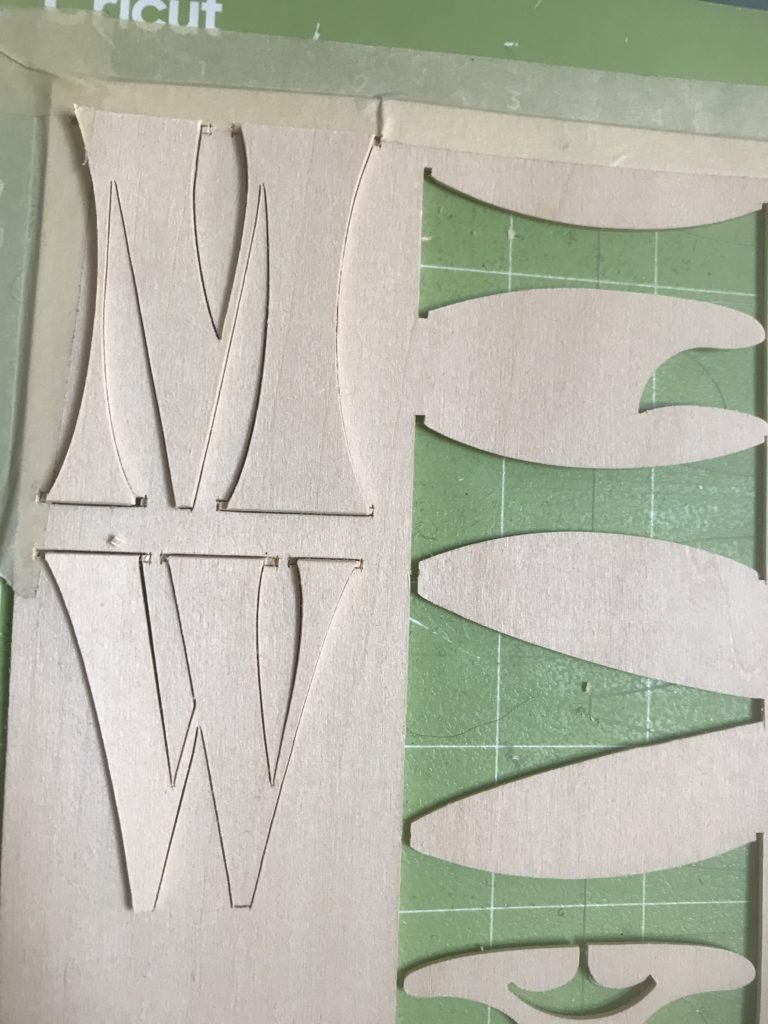
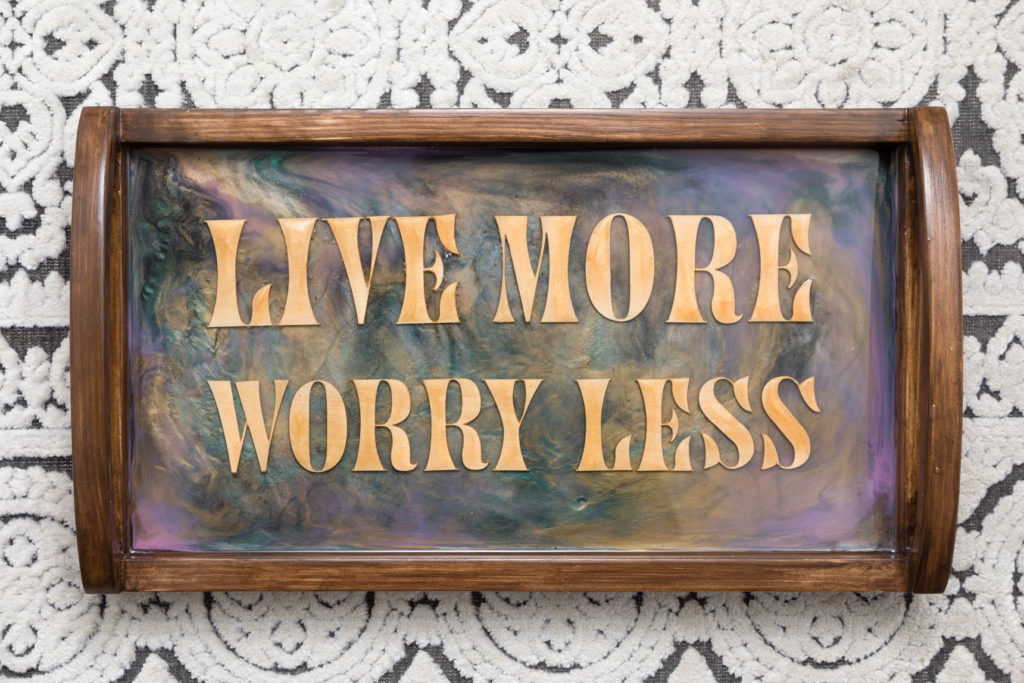
First, I used my Cricut Maker with the knife blade to cut the quote out of basswood. With the type I used, I had to stop it early because the letters started breaking at the skinny parts. I would suggest using a thicker typeface. It’s important to push all of the white feeder wheels to the right side of the pole in the machine. Also, make sure to use masking tape around all sides of the wood to secure it.
Some things to keep in mind while working with resin:
Always use Personal Protective Equipment (PPE) when working with resin. This includes disposable gloves, a respirator mask, and safety glasses.
Resin has fumes so it is important to work in a well-ventilated area, preferably one that has temperature control. Resin works best between 70 and 80 degrees Fahrenheit with no humidity.
It is best to work with resin when it is warm. There is a way to warm it in the containers before measuring and mixing. If you fill a bucket with warm water (not hot) and let the containers sit for 5-10 minutes it will warm up. When you take the containers out of the water make sure to thoroughly dry them with a towel before opening them.
Water will keep the resin from curing, always keep your area free of water when using resin. Do not place any wet objects into a resin project. If you want to use plants or wood make sure they are completely dried first.
When measuring your resin and hardener always read the instructions on the resin you are using. There are all different kinds that use different ratios. For the particular resin that I was using it required a 1:1 ratio. I poured equal parts (by volume) of each and mixed them together.
Now mixing is another thing it’s important to get right, you don’t want to under stir it and not have it cure properly, if at all, and you don’t want to over stir and fill your resin with bubbles. The best way to stir it for smaller projects like this one is by hand for approximately 2 full minutes. I generally use a popsicle stick for this job. SLOWLY! Just keep it smooth and deliberate, it’s not a race. You want to make clockwise and counter-clockwise circles. Continuously scrape the sides of the cup and pull from the bottom to get it as evenly mixed as you can.
Resin Time!
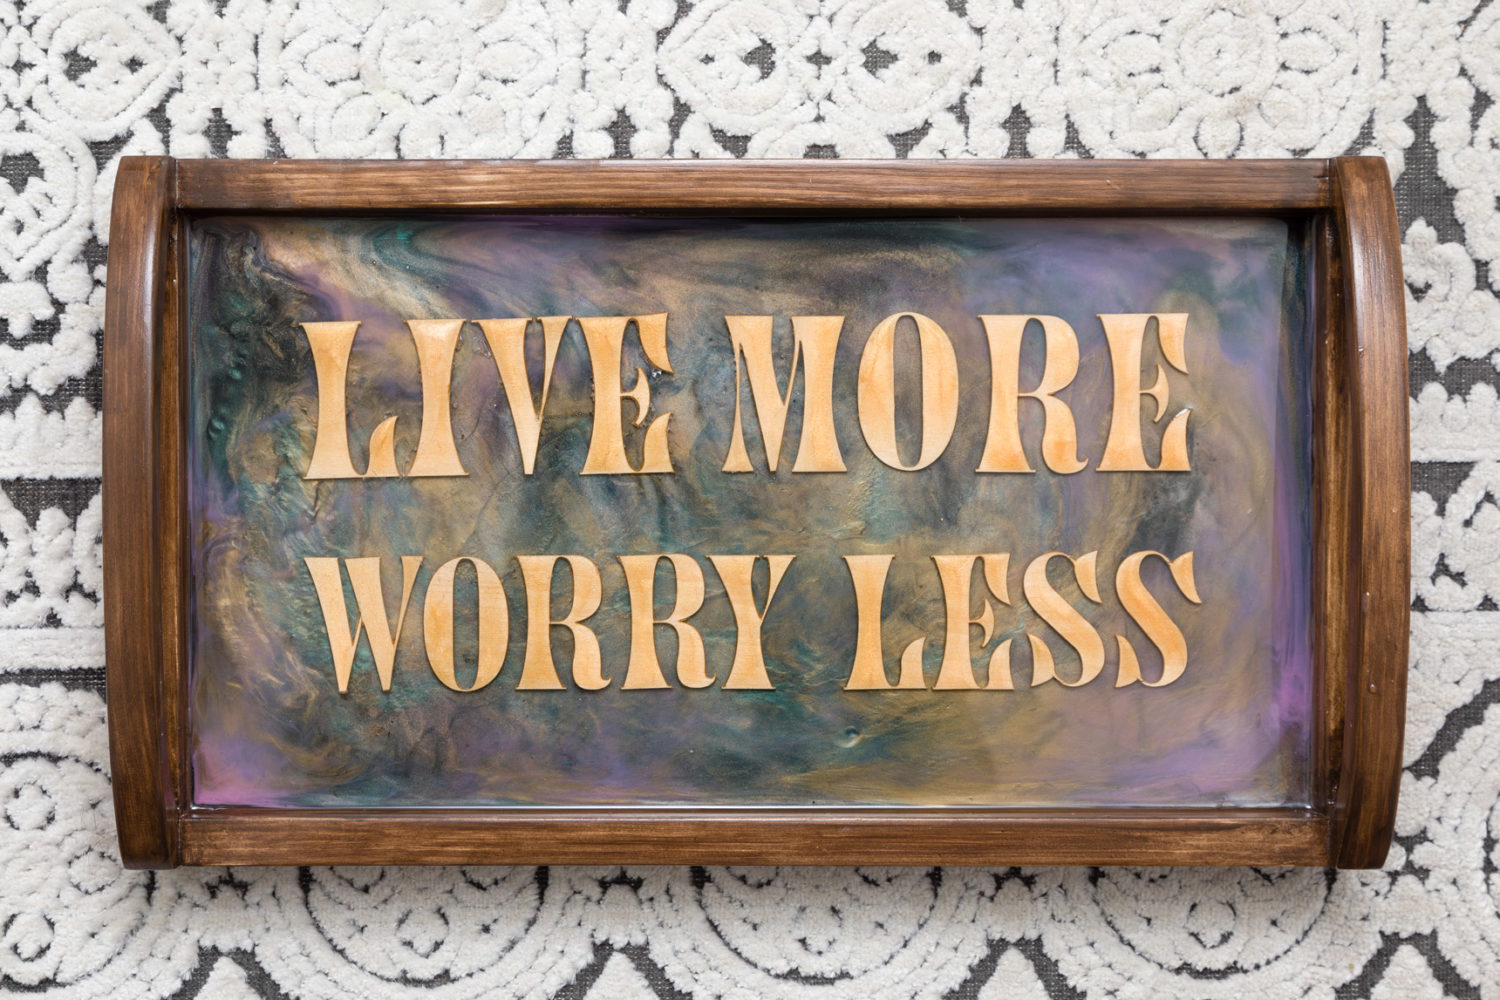
So I took my tray and my letters outside for the first batch of resin. I used some with a little bit of the Peacock color in it to do a seal coat. The seal coat is a thin layer of resin used to keep bubbles from forming from the wood pores.
At this point, I also mixed some gold mica powder into another batch of resin and, with a glue brush, coated each of the letters with it. I blasted everything with my heat gun and brought them inside to sit for approximately 24 hours.
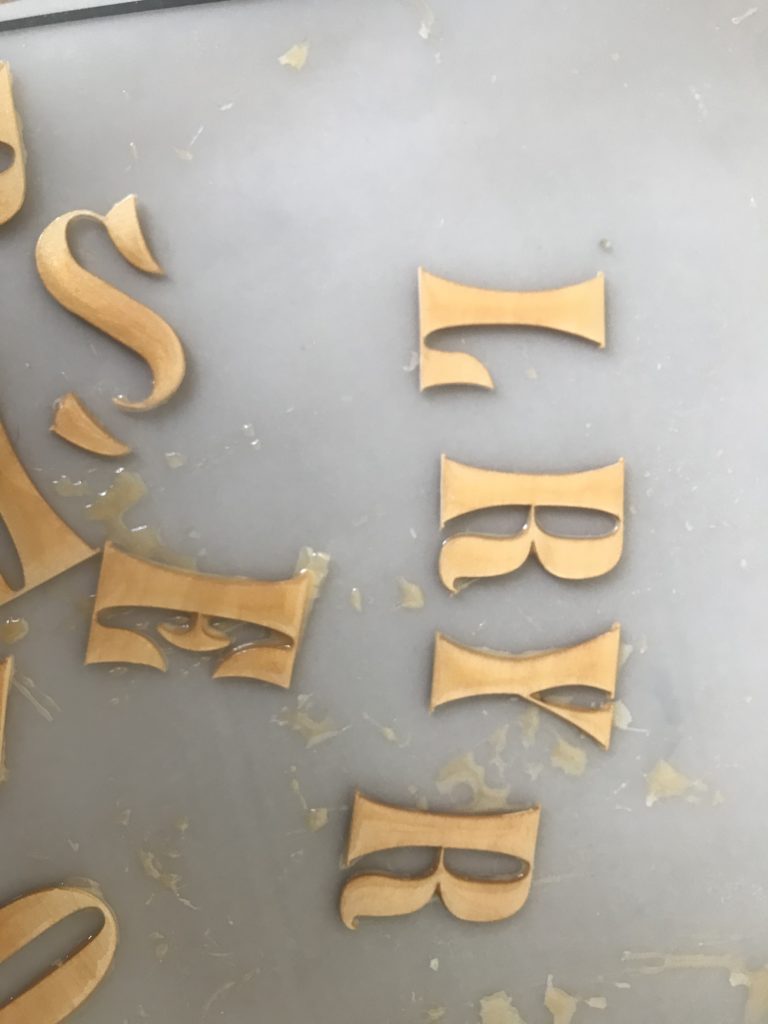
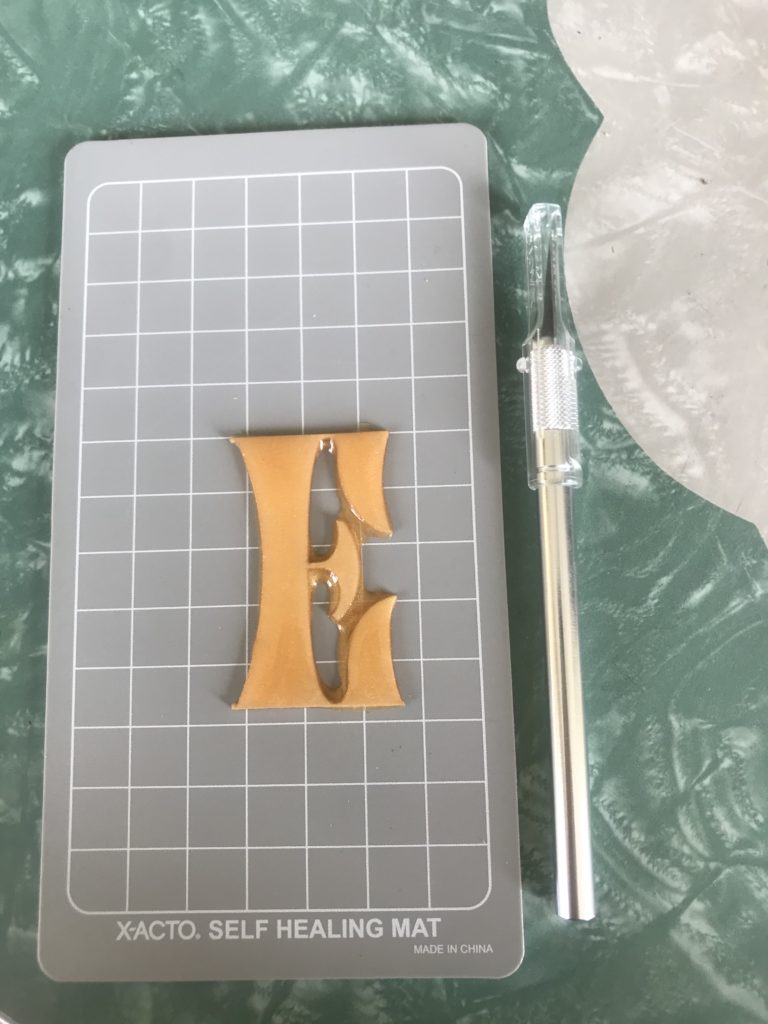
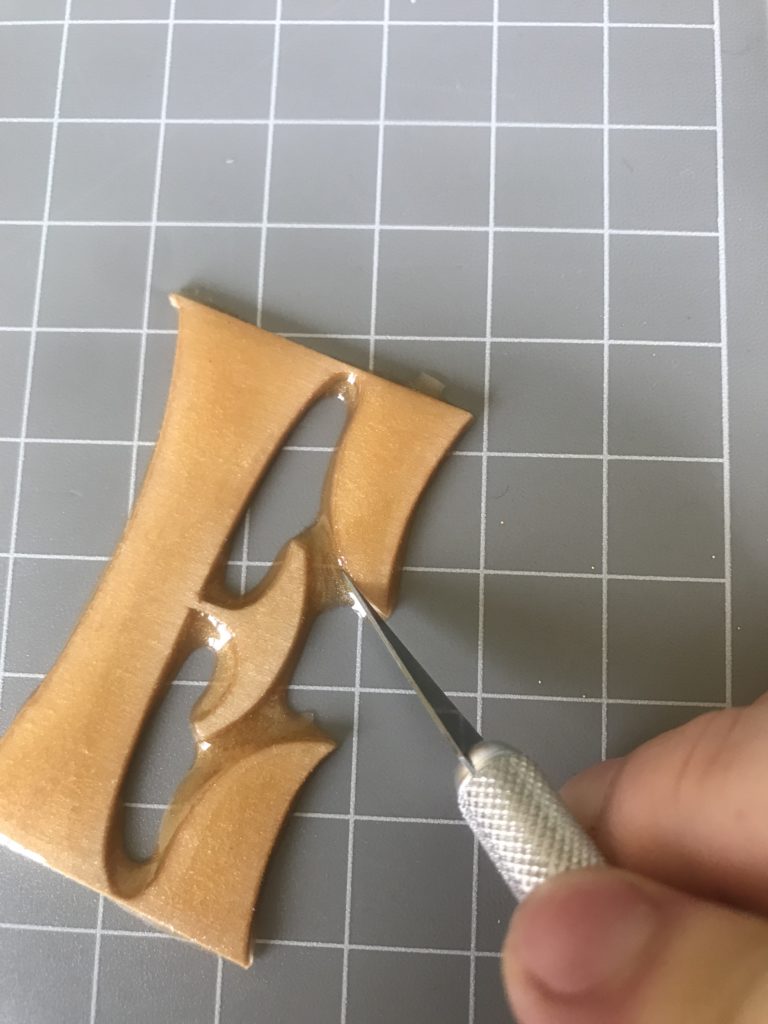
When everything had cured, I pulled each letter up from the silicone mat. Then, trimmed the excess resin that had formed around it off with an XACTO knife. I also took the tray back outside to start my first color layer.
For this, I mixed up about 4 oz. of resin and divided it among several small plastic cups. Each cup contained a different color of resin I mixed together. I used several eyeshadows and mica pigments in this layer. Poured in the colors randomly all over the inside of the tray. Then ‘feathered’ it out with the heat gun which also made the resin more fluid.
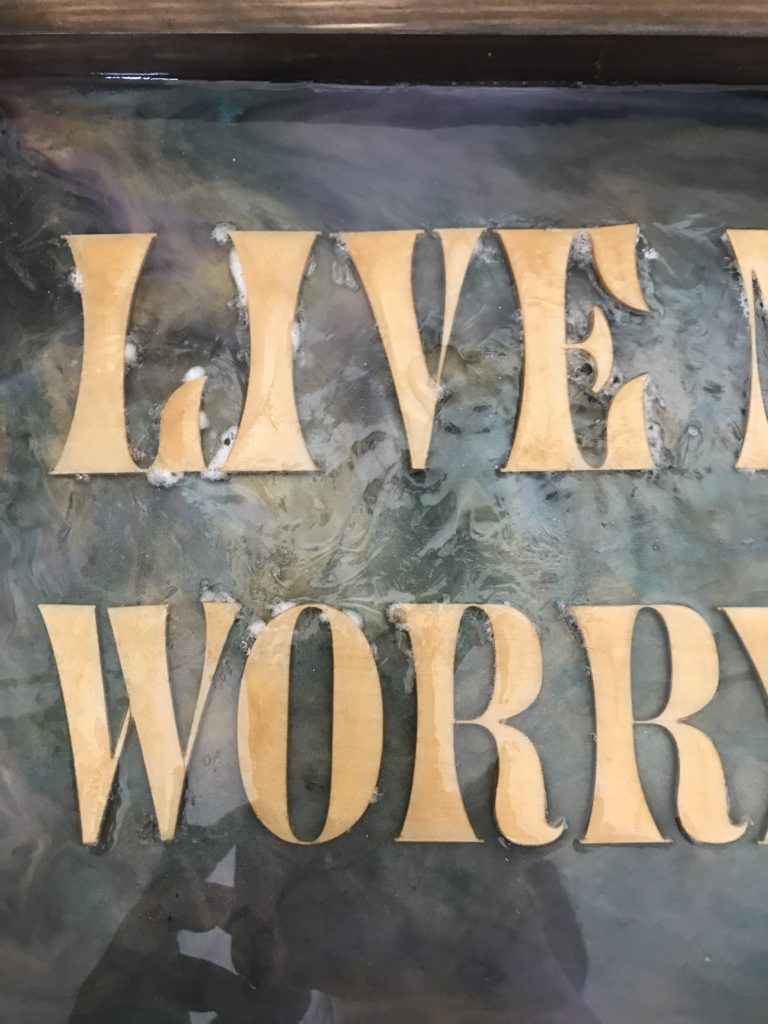
My first layer ended up having too much of a pearlized look for my taste. So I ended up adding two more layers to get more depth and representation of colors. On the last “background” layer I used an opaque dye in pink which broke up the rest of it nicely. Once that layer was cured it was time to add the letters!
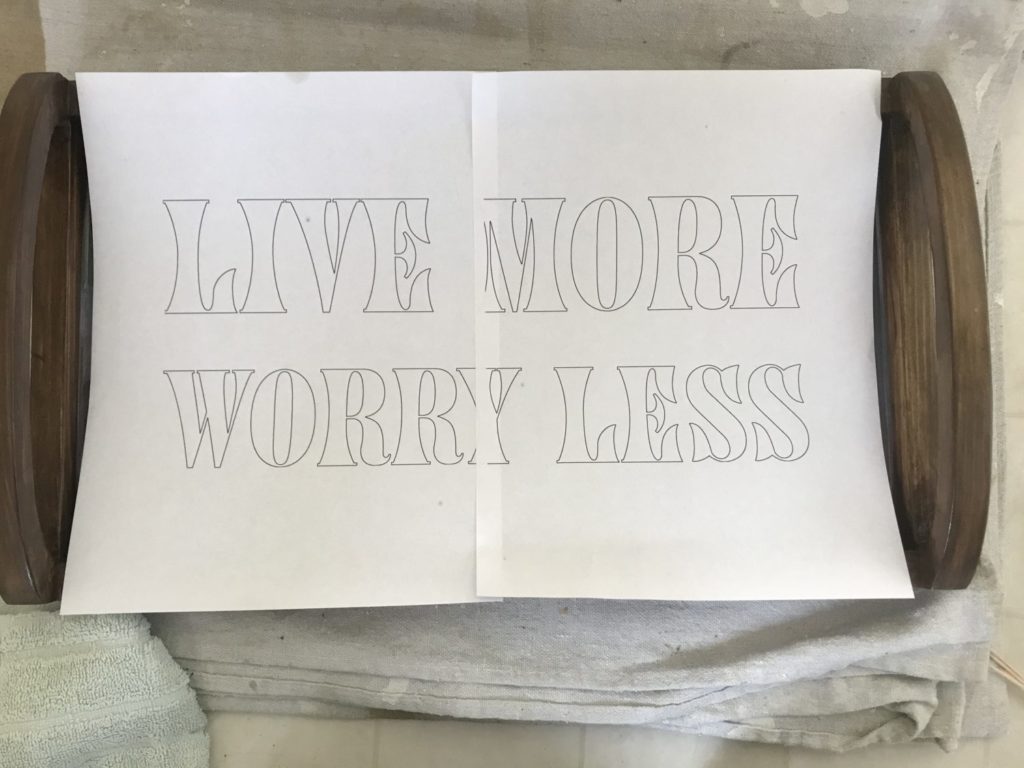
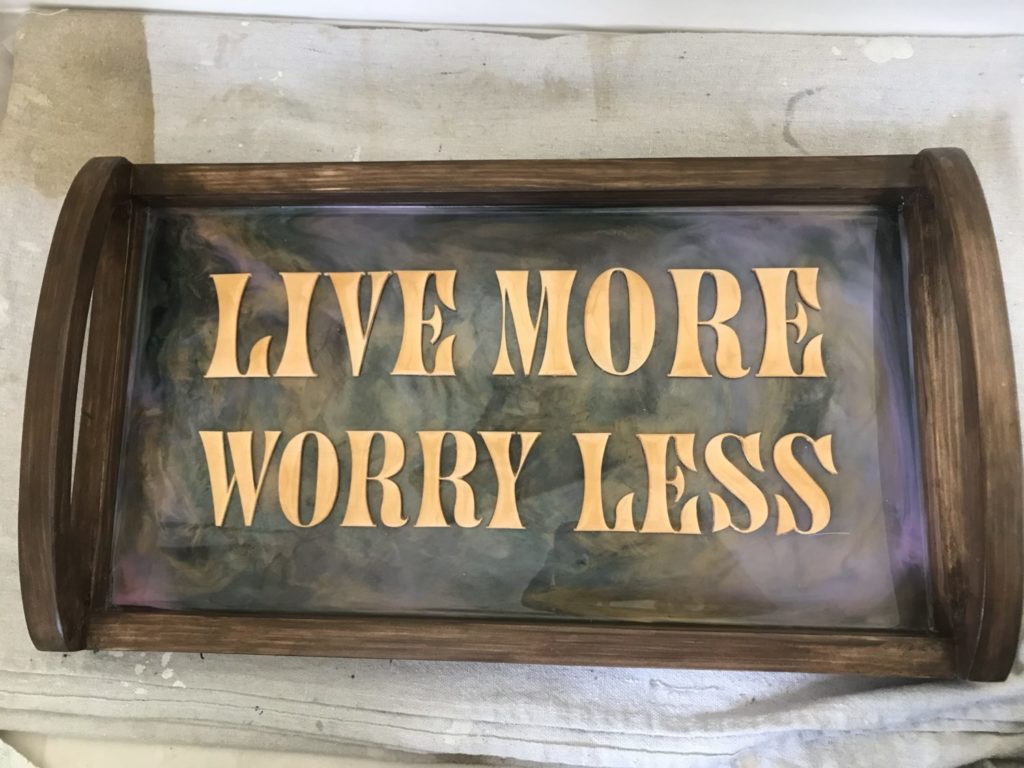
Live More Worry Less
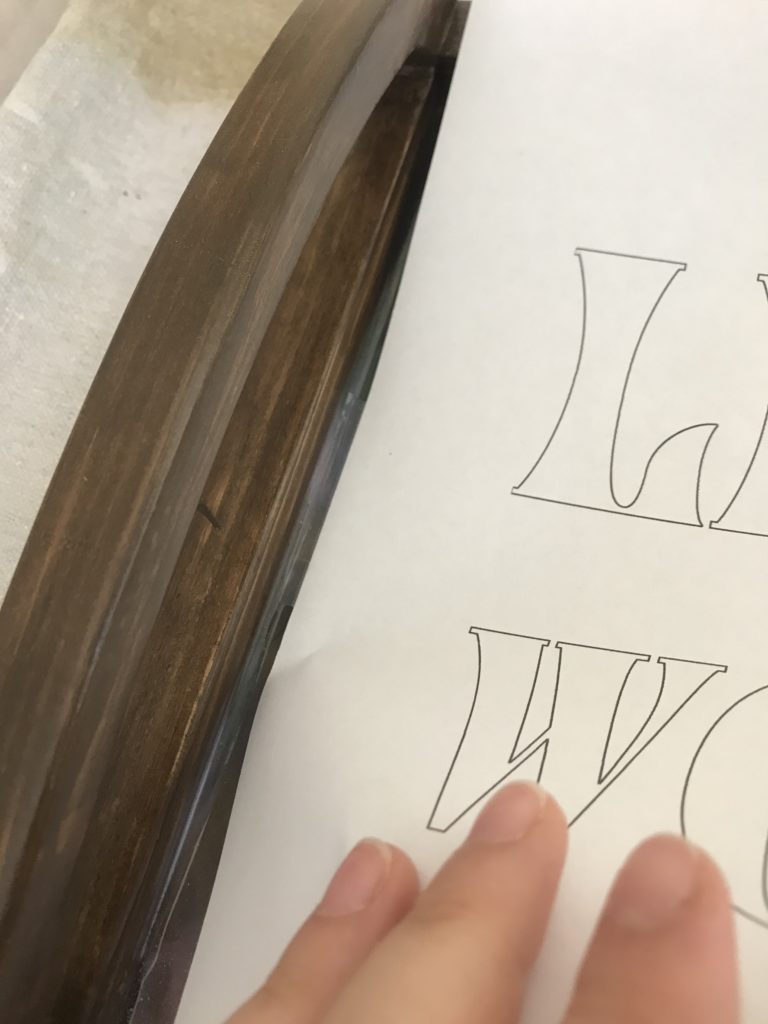
To get the placement right and keep the letters straight, I first printed out a copy of my SVG. I centered the paper over the bottom of the tray and taped it down on the left side. From there, I took my XACTO knife and cut into the resin to make marks near the edges of where each letter would go. Then, using a high temp hot glue gun, I glued each letter in place. If I did it again I would probably use either a 5-minute epoxy or super glue.
I mixed more resin, not adding any color and poured it over the letters. Some of the letters started coming up at the ends, while another letter became loose and was floating around in the resin. Using a silicone spatula I managed to hold the letter in place and blasted it several times with the heat gun. I also continued blasting some areas where bubbles kept producing around some of the letters. But, I heated it to the point where the top had formed a skin on top, leaving no way for any more air to escape.
Live More Worry More?
I stopped. Stepped away, and waited.
Troubleshooting
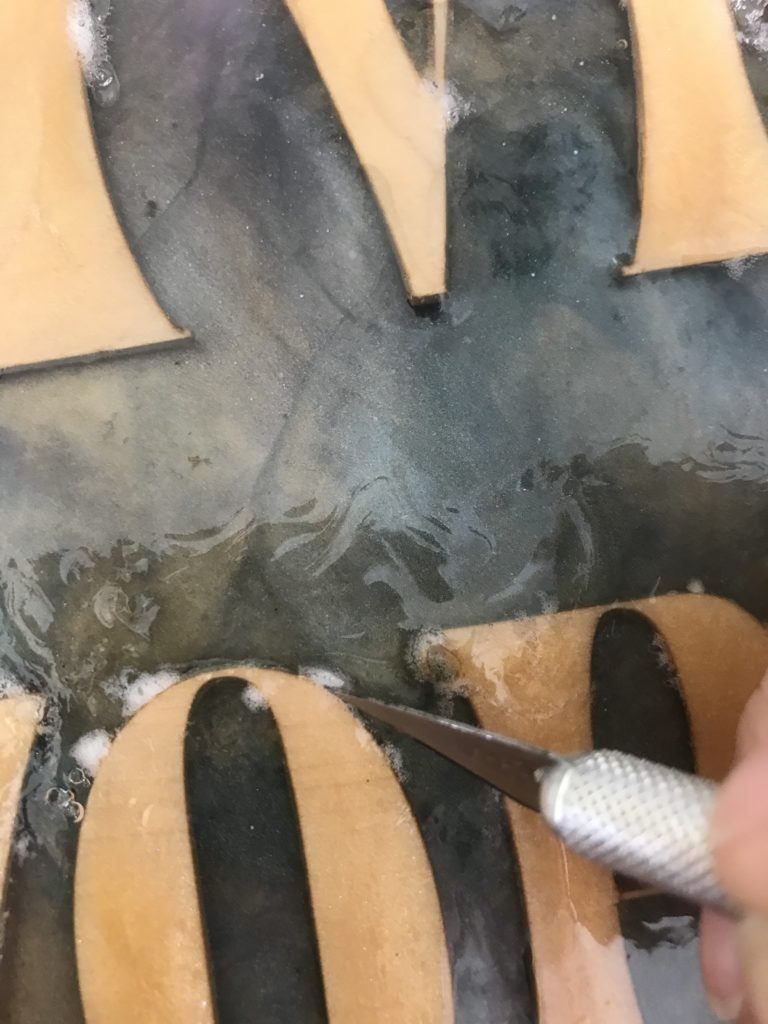
Once the layer had cured I used my XACTO knife, a Dremel, and 220 grit sandpaper to cut away and sand all of the areas with bubbles. After wiping off the dust and spraying it with some compressed air, I poured one final layer to fill in the holes and seal it all in. That’s one of the great things about resin, it’s very forgiving. It may be picky about some things, but if you get rid of some and pour more on top, it’s like nothing wrong ever happened.

Easy Unicorn Glitter Epoxy Resin Coaster How To | Olivia OHern
Sunday 13th of June 2021
[…] How to Make a Rose Gold Epoxy Resin Coaster Wood & Resin River Charcuterie Board How To How to Make a Resin Quote Tray […]
Wood & Resin River Charcuterie Board | Olivia OHern
Friday 11th of June 2021
[…] first, head over to my other post where I explain important safety and optimal use information when working with epoxy […]
How to Make an Easy Modern Epoxy Resin Tray | Olivia OHern
Monday 7th of June 2021
[…] that epoxy resin tray I made? (THIS ONE) Well, my mom saw it and she wanted one too, so I figured to show this easy modern epoxy resin tray […]
How to Make a Modern Boho Hanging Planter | Olivia OHern
Friday 28th of May 2021
[…] Wood & Resin River Charcuterie Board How to Make a Resin Quote Tray […]