This post is part of an Easter blog hop hosted by Kippi at Home. So don’t forget to scroll to the bottom of this post for more Easter Craft Ideas!
Supplies
This post may contain affiliate links. This means that if you purchase from one of these links I will make a small commission, but rest assured you will not pay more for any products.
- Cardstock
- 2×4
- Felt
- Permanent Marker
- Colored Pencil – Blush Pink
- Hot Glue Gun
- White Paint
- Paintbrush
- Scissors
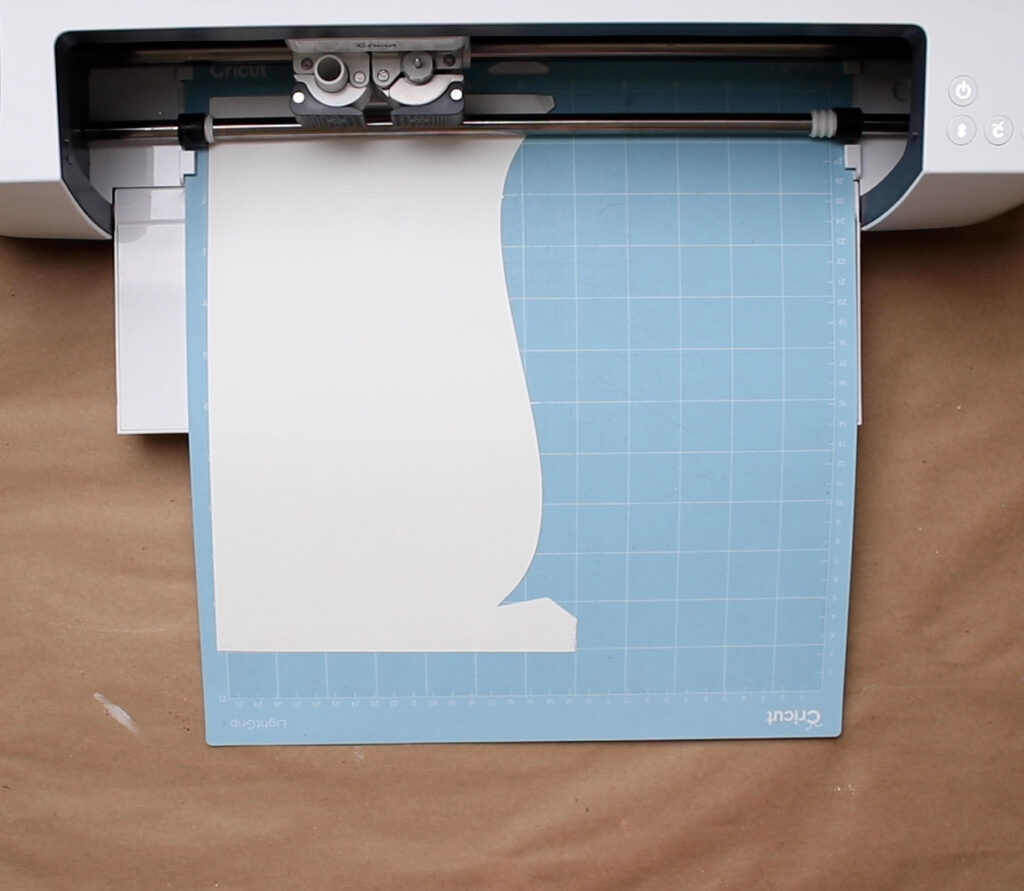
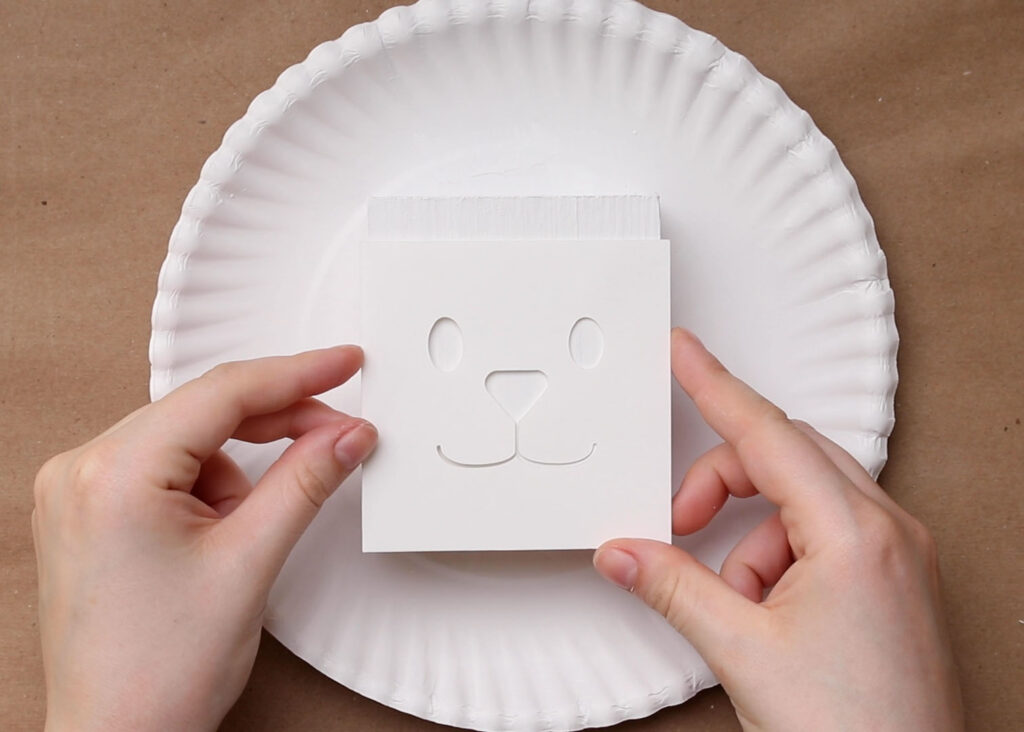
Whenever I am working on a project that will require paint, I like to get everything that doesn’t require paint done and out of the way first so I don’t end up with paint on everything. So to start, I cut out the template I designed for the face out of cardstock on my Cricut Maker.
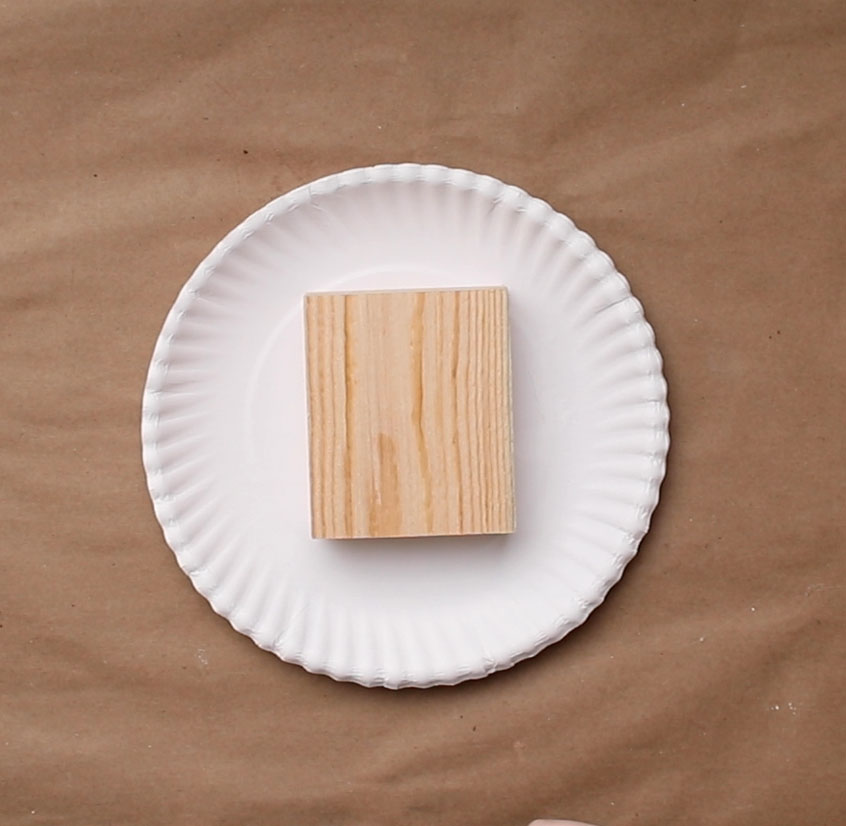
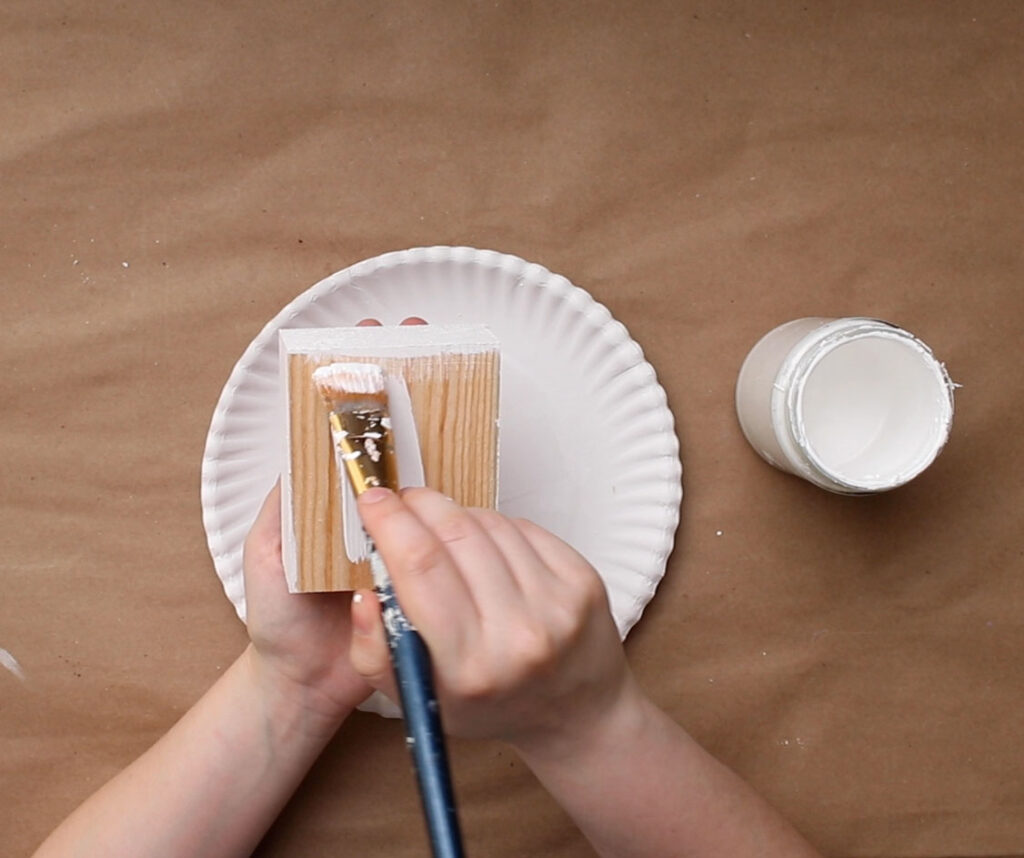
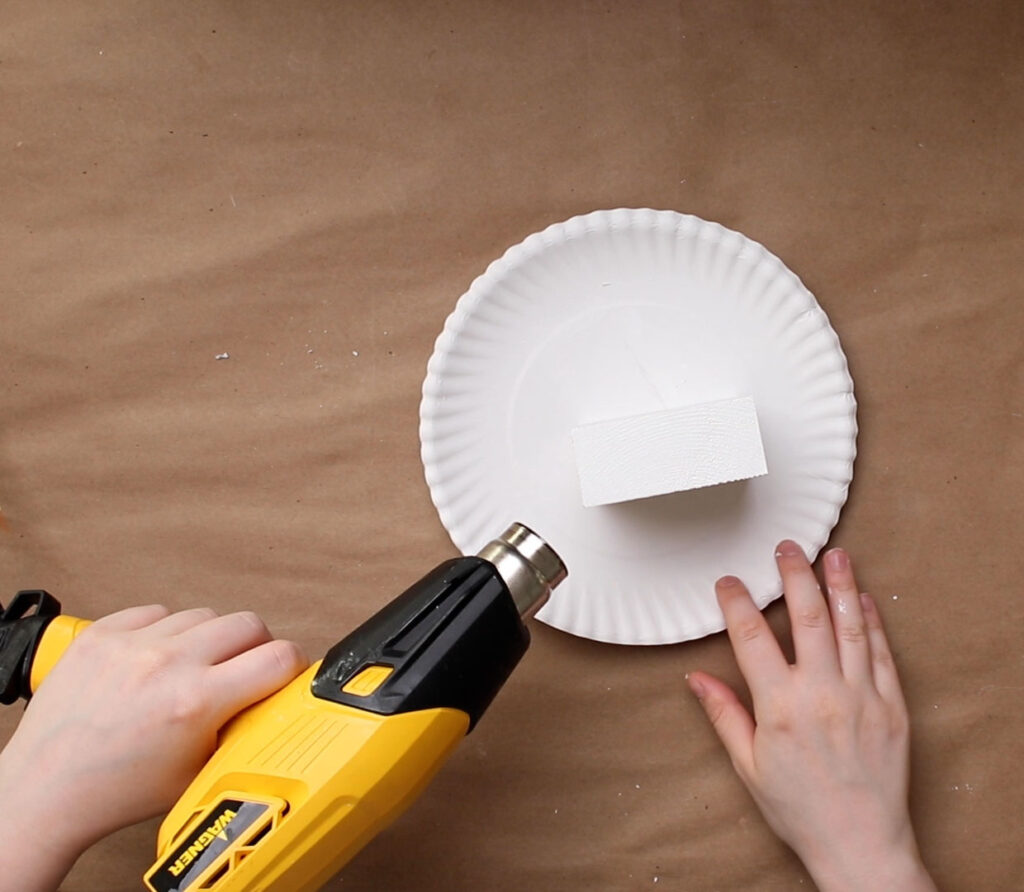
Then I cut a 4 inch piece of a 2 x 4 and paint 5 sides of the piece of wood, leaving the end that will be the bottom bare. I like to use chalk paint because of the matte finish, high coverage, and how to can be sanded smooth, but acrylic paint will definitely work as well, THIS is my go-to. It took 2 coats to get it completely white, I love using my heat gun, because I can dry my paint super fast. But be careful! I managed to burn my arm on the metal tip…Ouch! (That’s why you’ll see a bandage peeking out in some of the pictures below.)
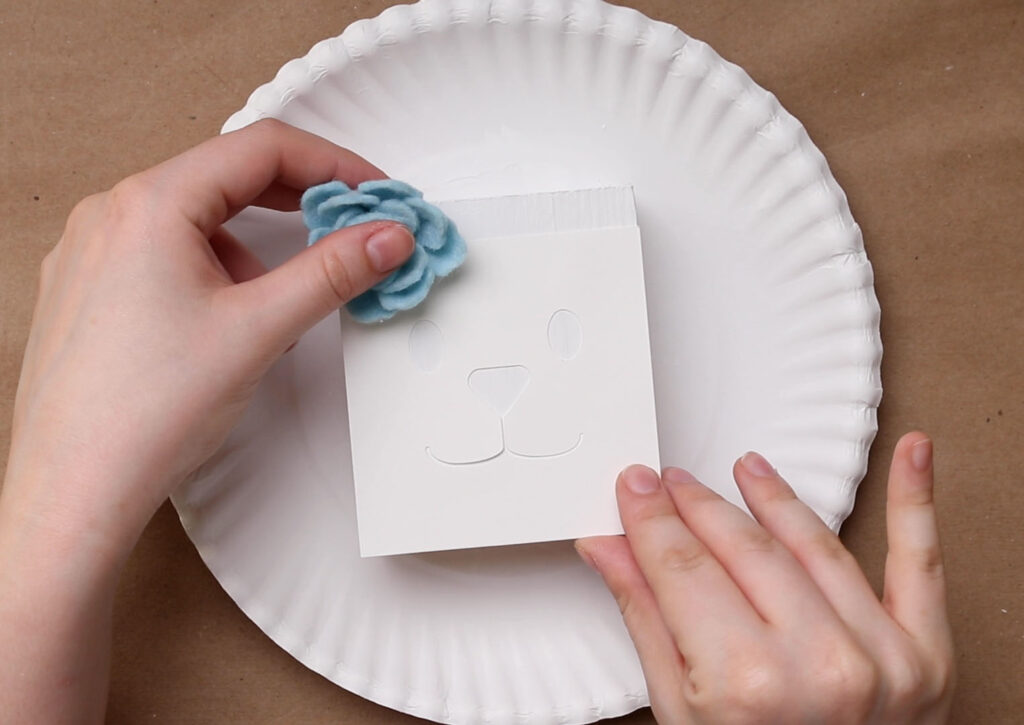
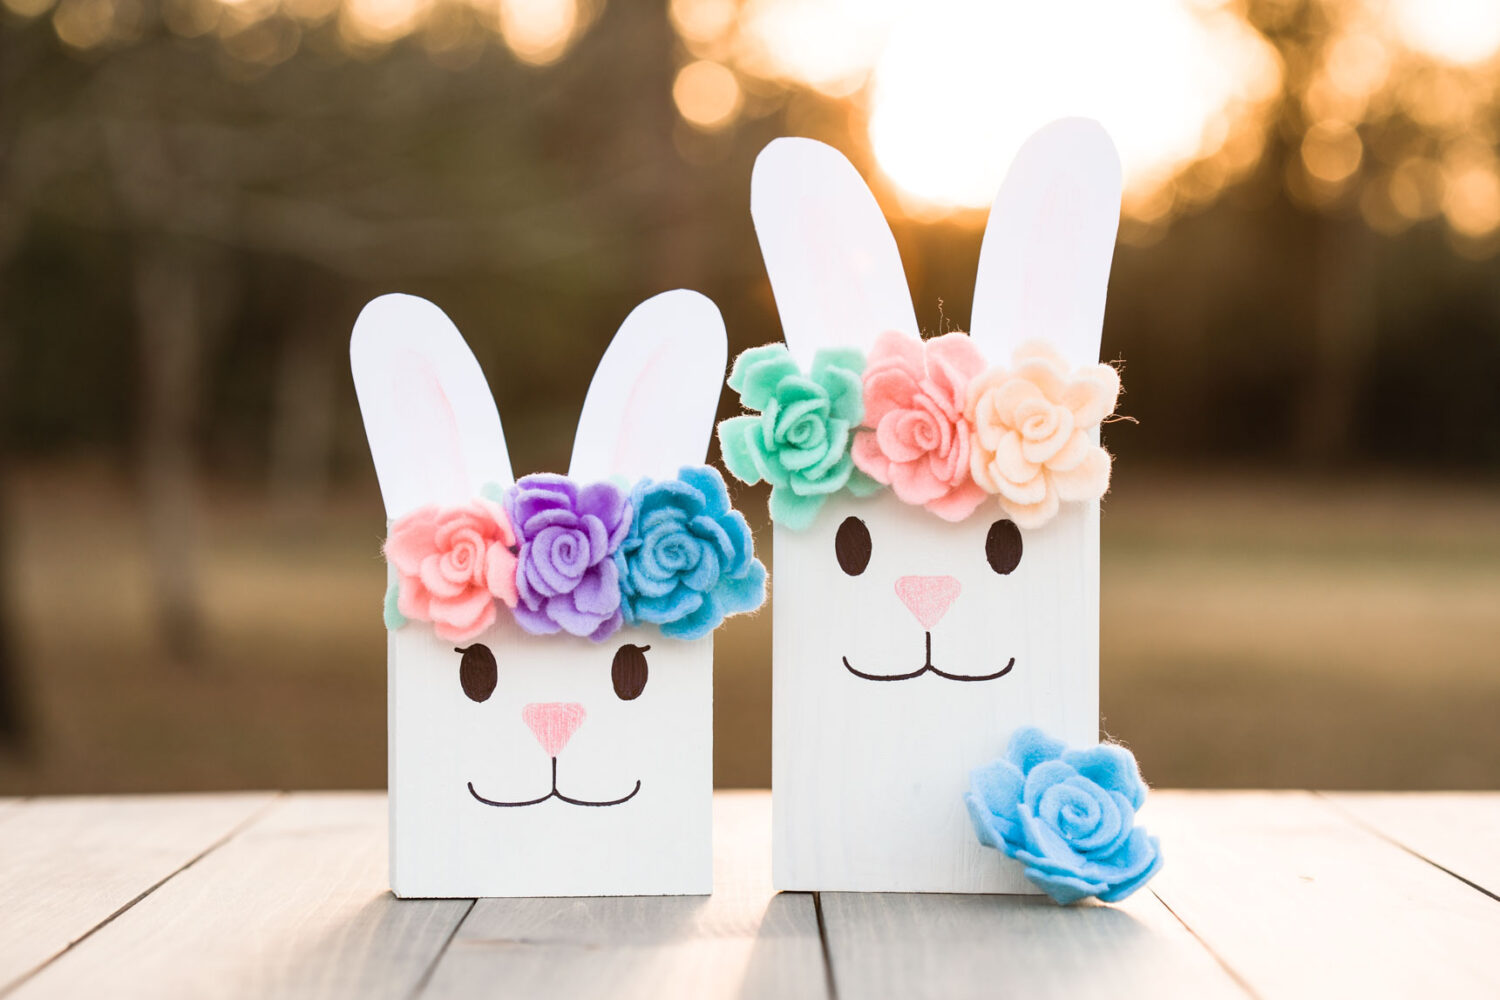
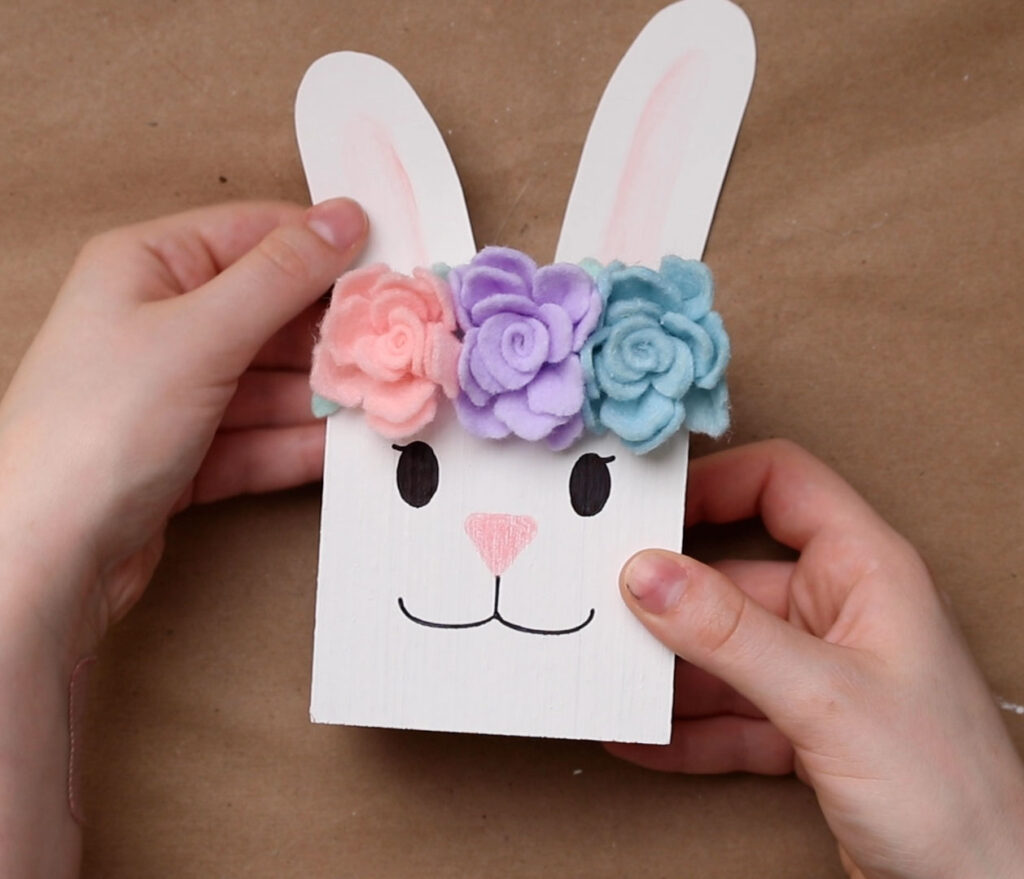
I use one of the flowers that I will be adding later to determine where I want to place the face.
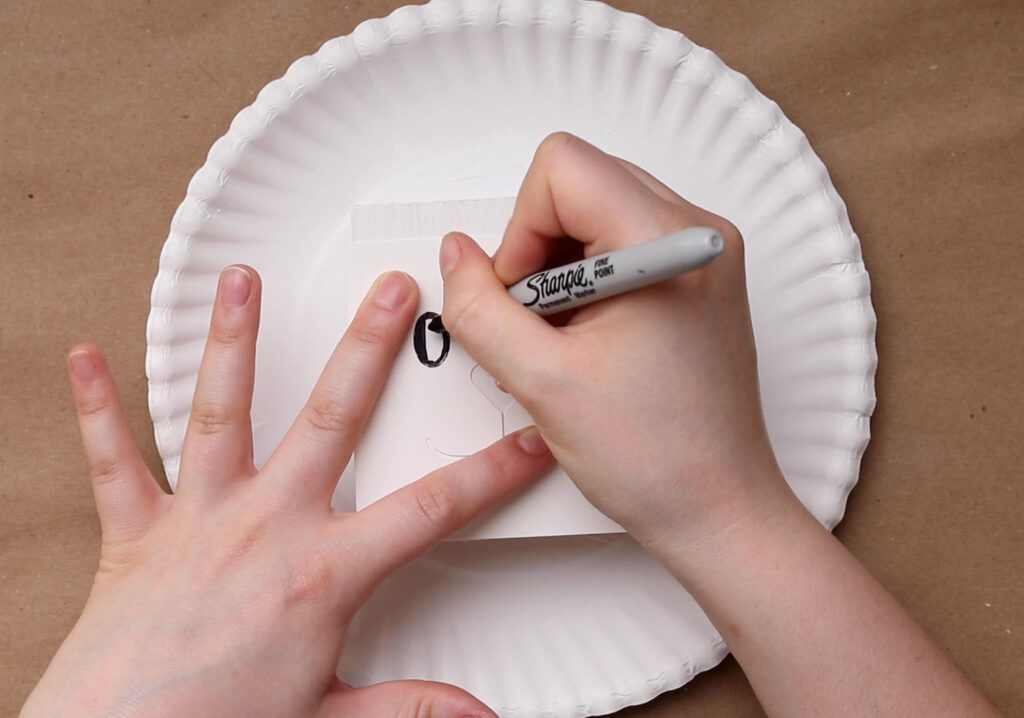
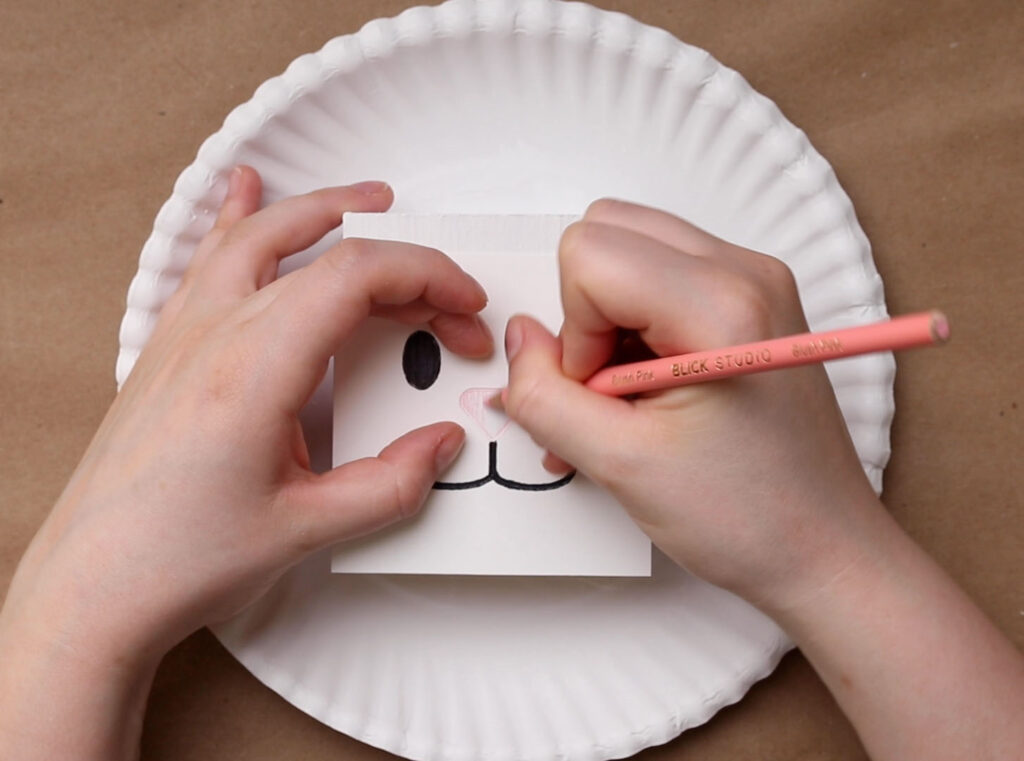
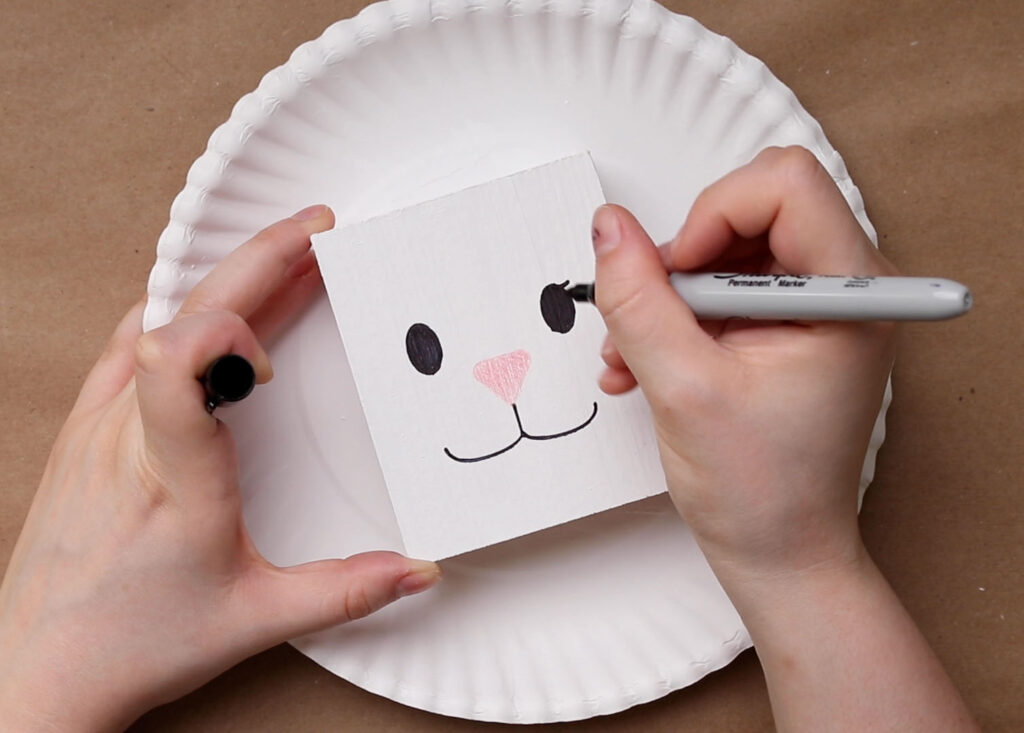
Then I can go in with a permanent marker to draw the face on. I like to outline the shape and then fill it in. For the nose I used a pink colored pencil. I also added little lashes on the eyes for a final little touch.
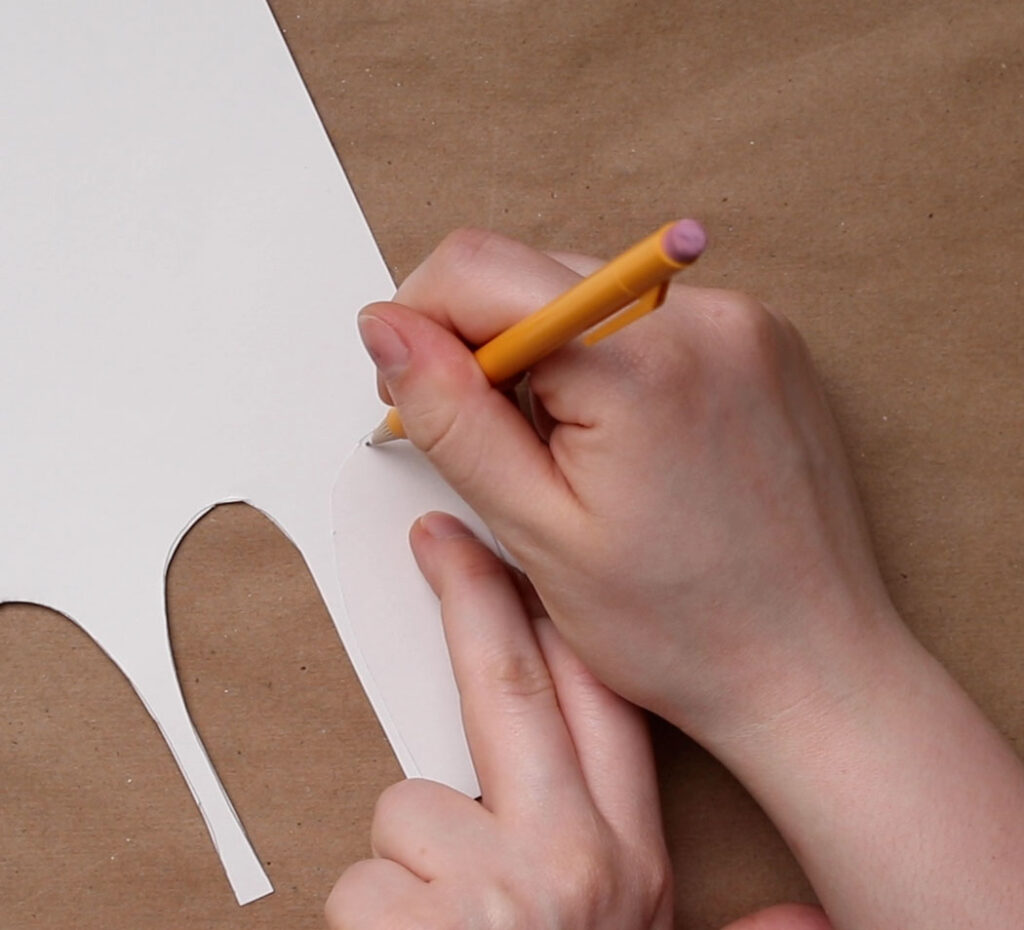

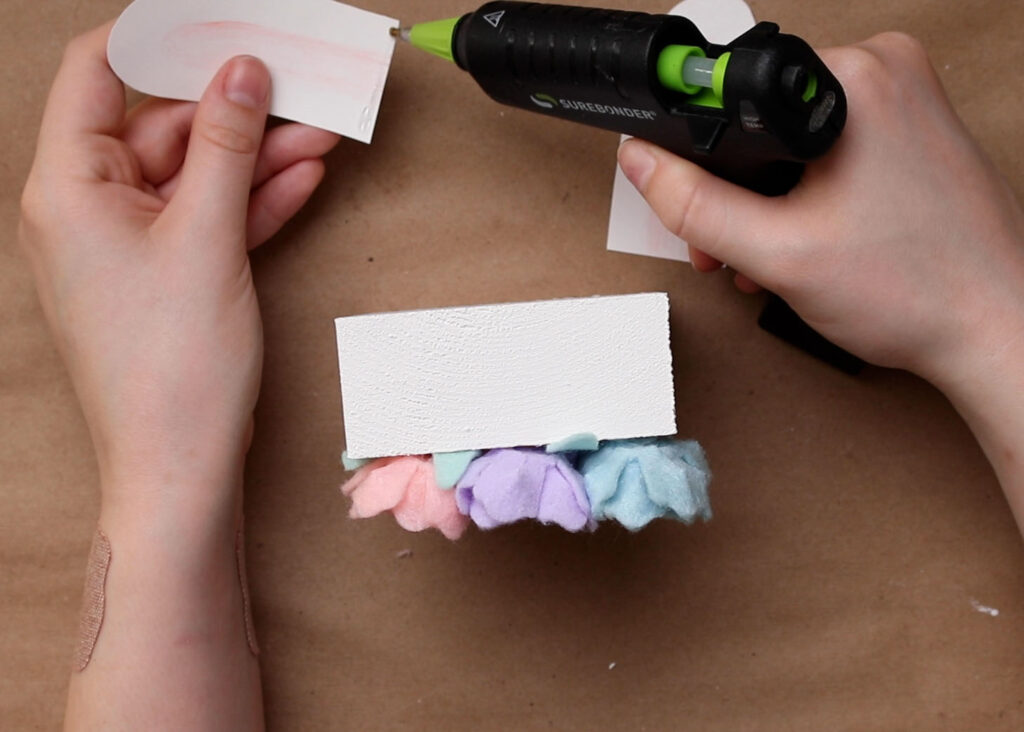
For these ears, I freehanded an ear shape I liked and then traced around it to make the other ear. This is on the same cardstock that I used for the face template. Because I added a little curve to the ears I had to keep in mind that they need to go in opposite directions when coloring in the inner part of the ears. This is with the same pink as the nose.
Scroll further down to see how I made the flowers I used on the bunny!
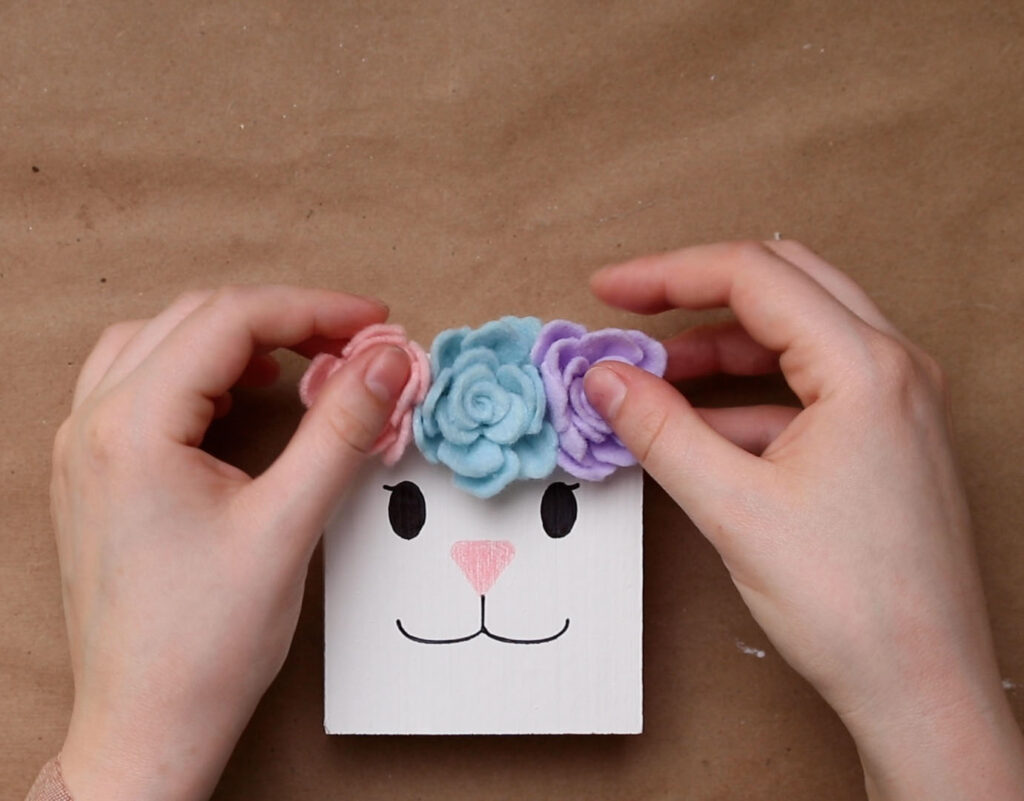
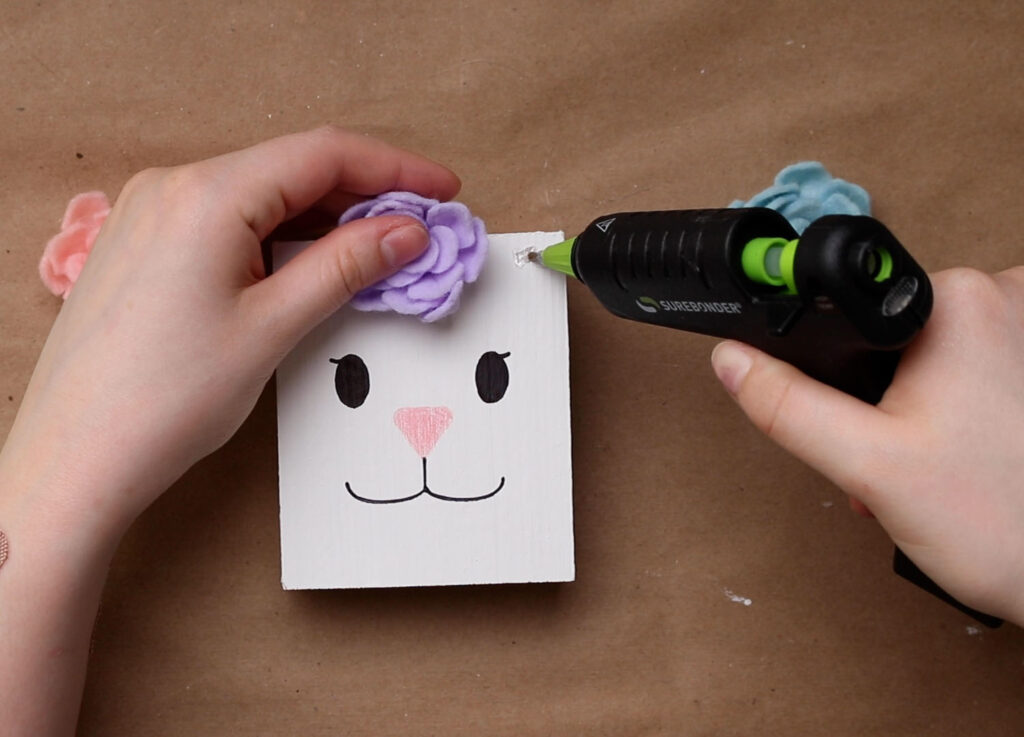
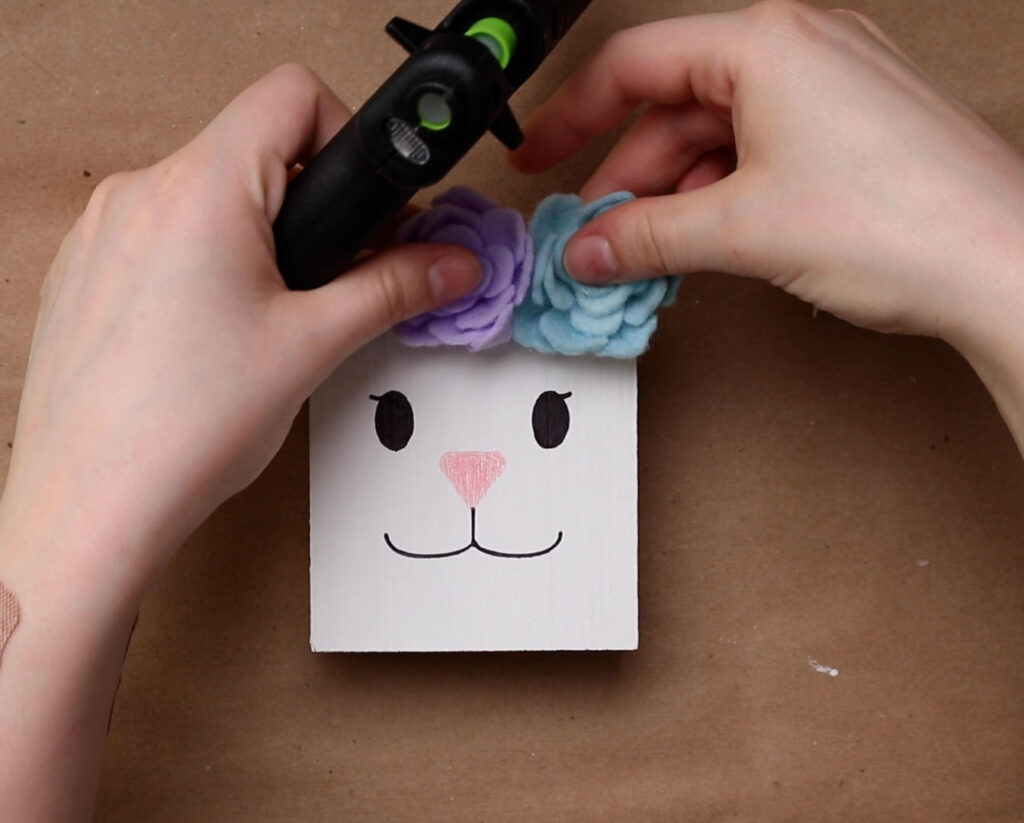
I always, always figure out how I want things placed before committing to them with hot glue. Sometimes I still end up making changes while gluing, but I have the basis of what I want in my head. Hot glue the center flower first and then the outer ones.
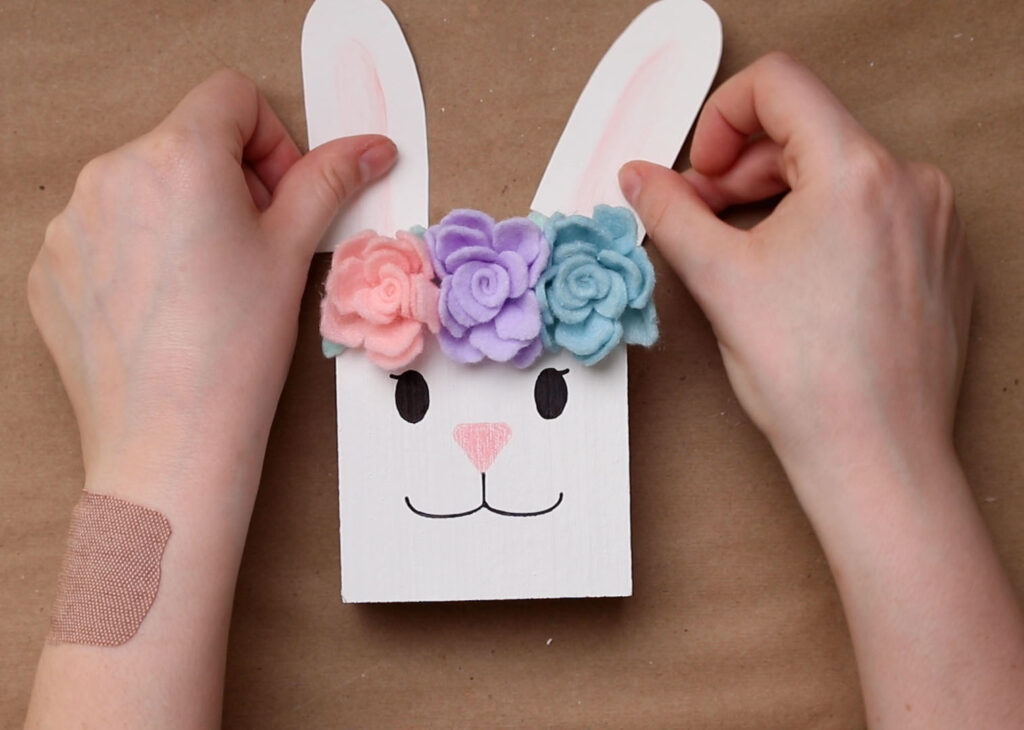
Now I’m adding my bunny’s ears. I like how it looks for the outer edges of the ears to meet with the outer edge of the block. All that is needed is a little line of hot glue at the bottom of the ear and then pushed onto the back of the block.
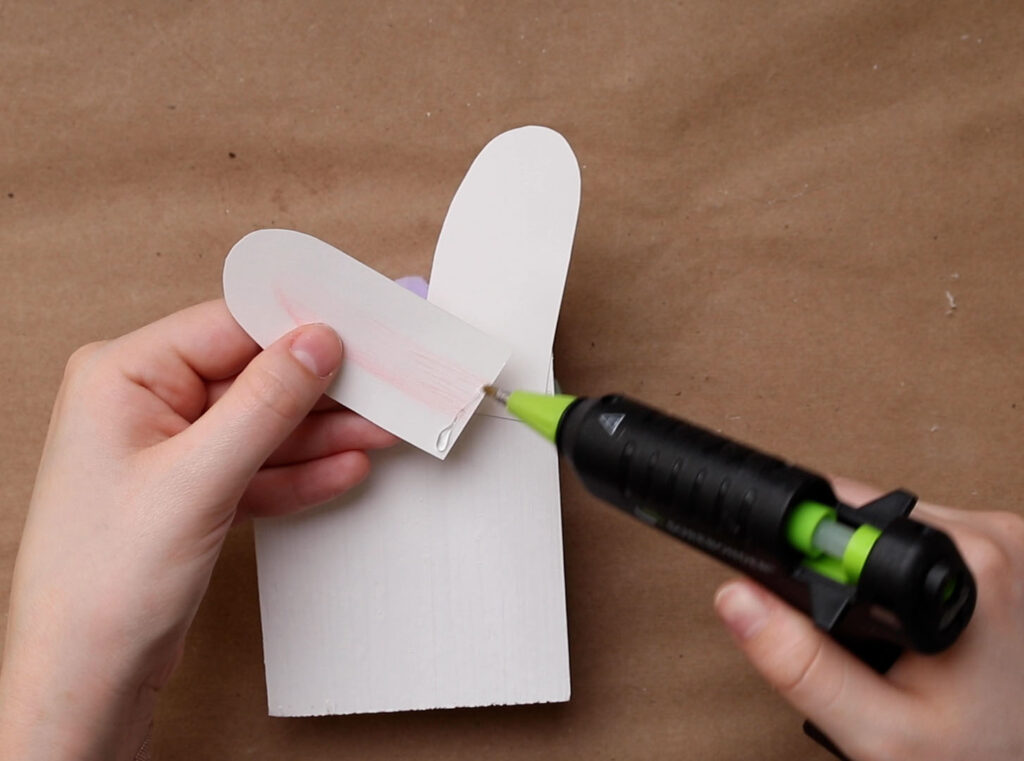
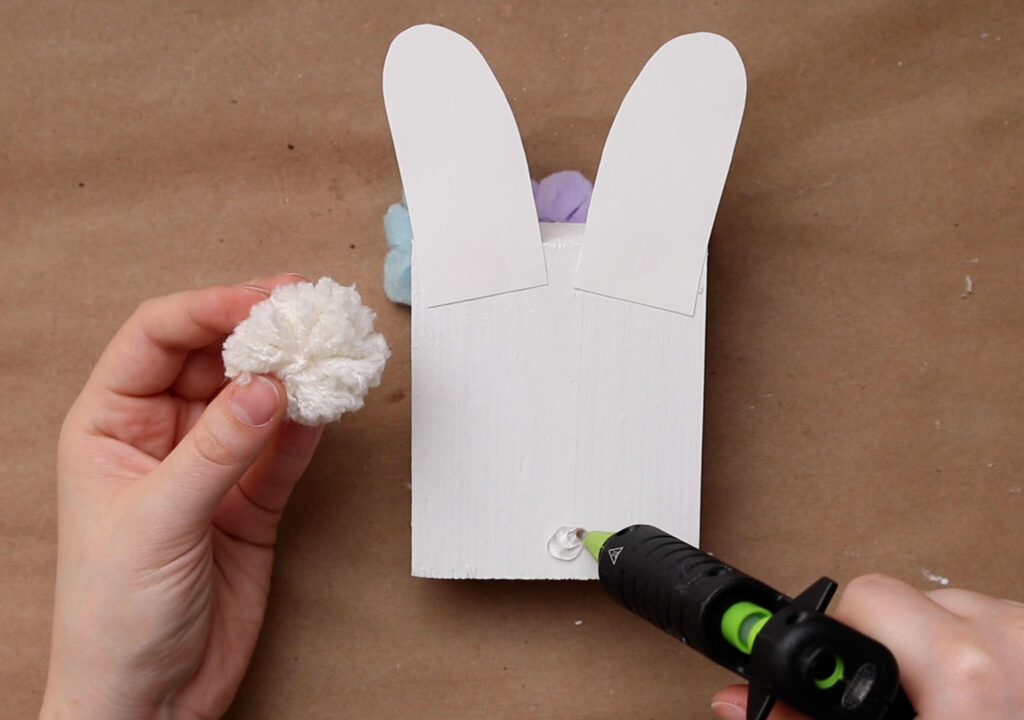
For the second ear, I flip it over before gluing so I can make sure the ears turn out even. While back there, I also hot glue an extra pom pom I had floating around to make a cute, fluffy tail.
How to Make Felt Flowers
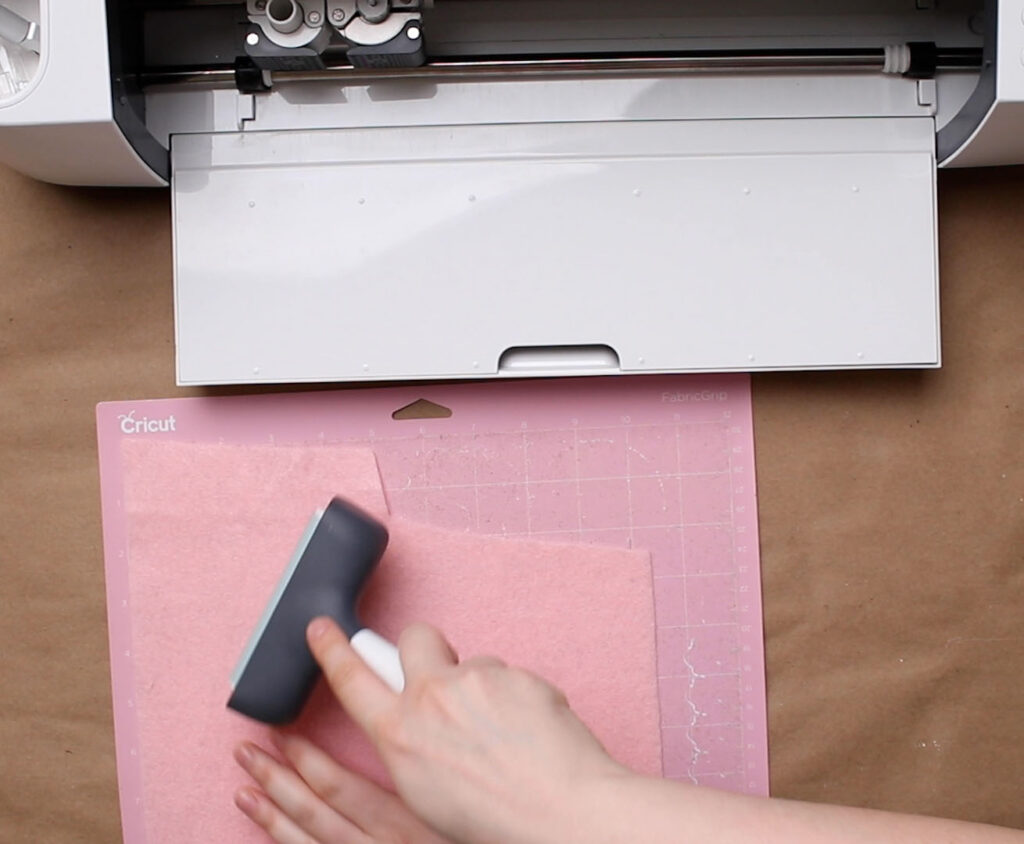
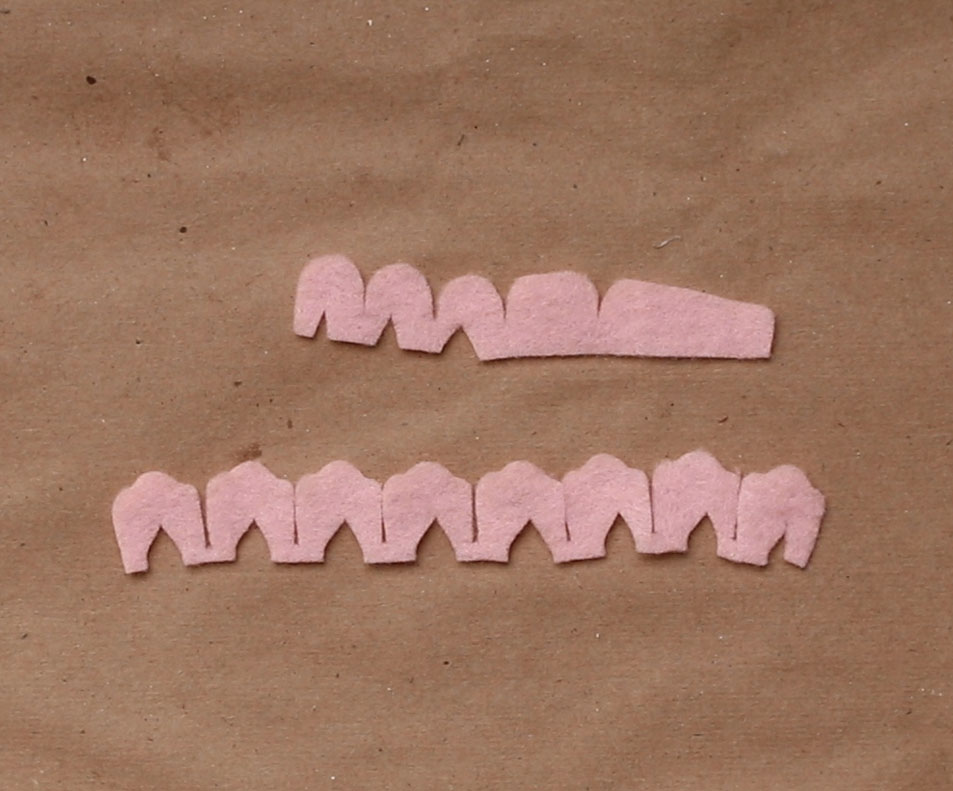
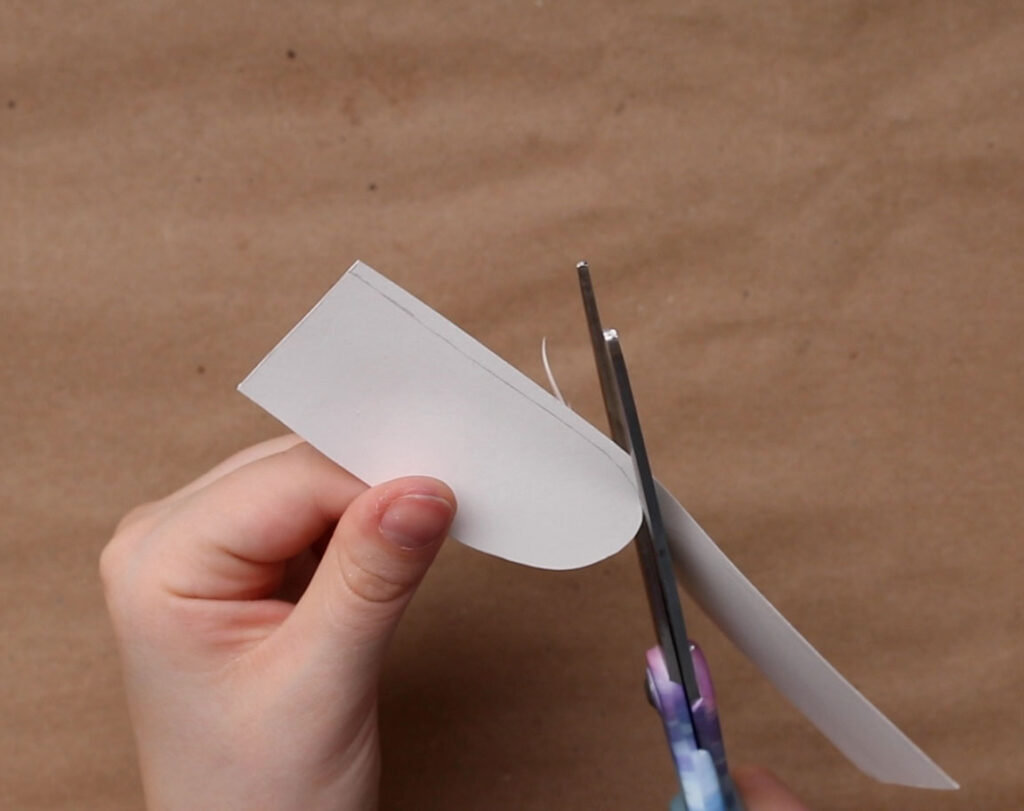
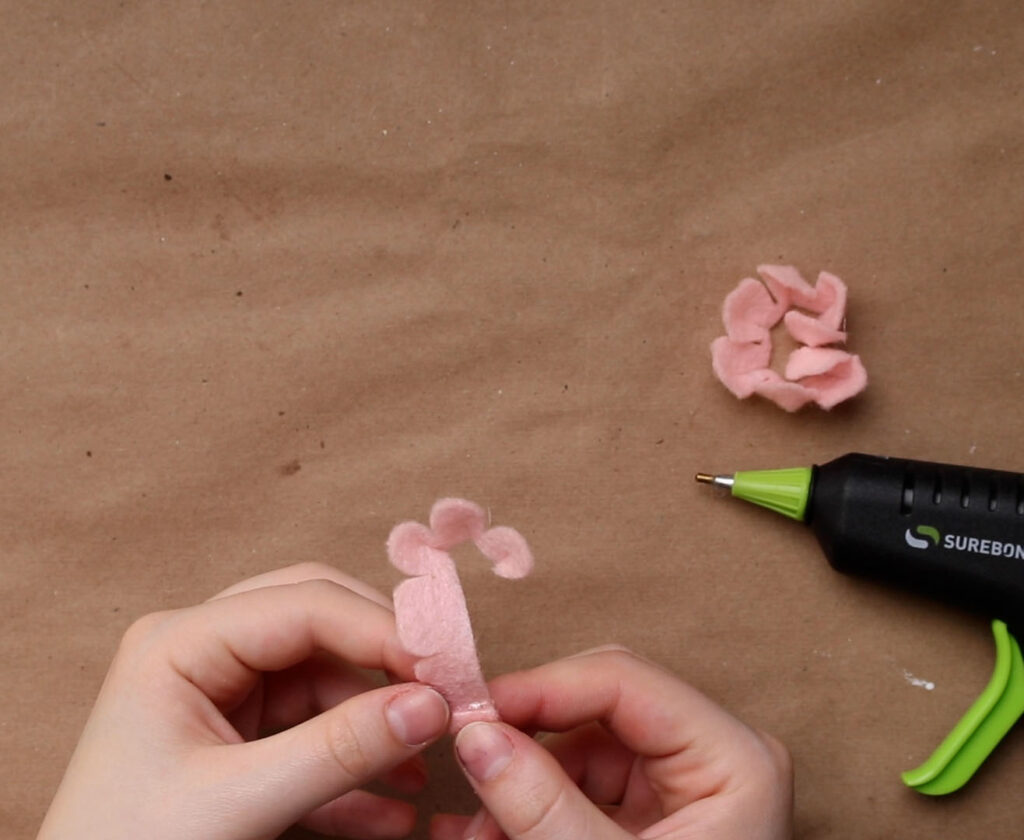
For the flowers I cut out a pattern I found online. You can find all kinds of flowers to cut out in Cricut Design Space. When in the Canvas go to Images to find them. This pattern cuts two pieces. The shorter one is the center of the flower and the longer one is the outer petals.
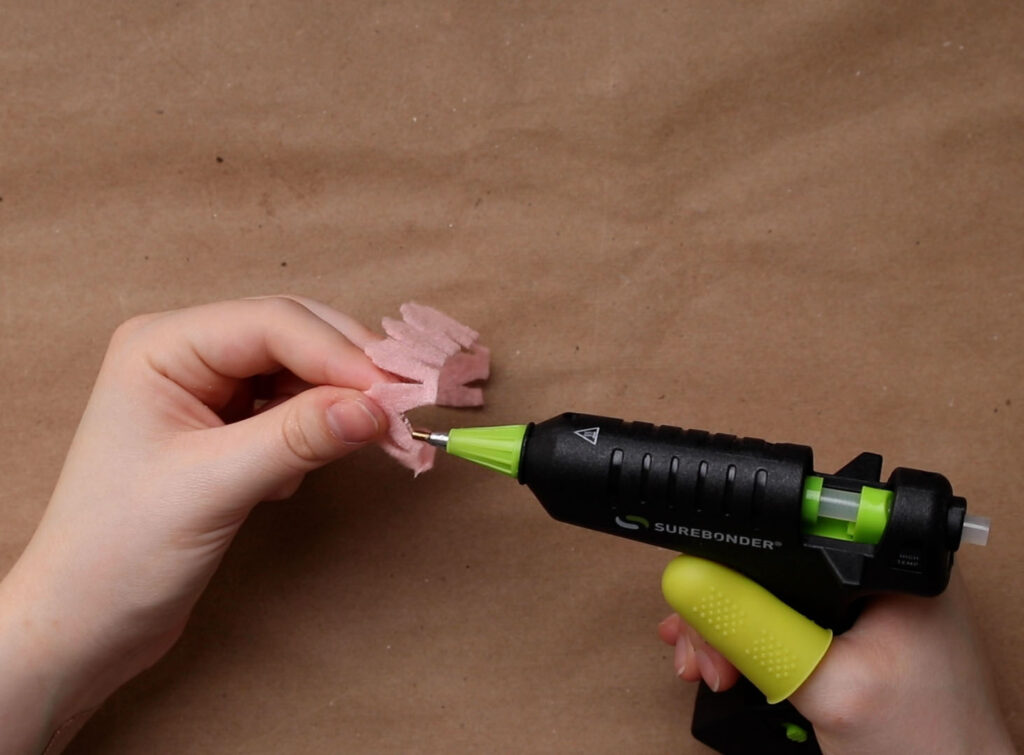
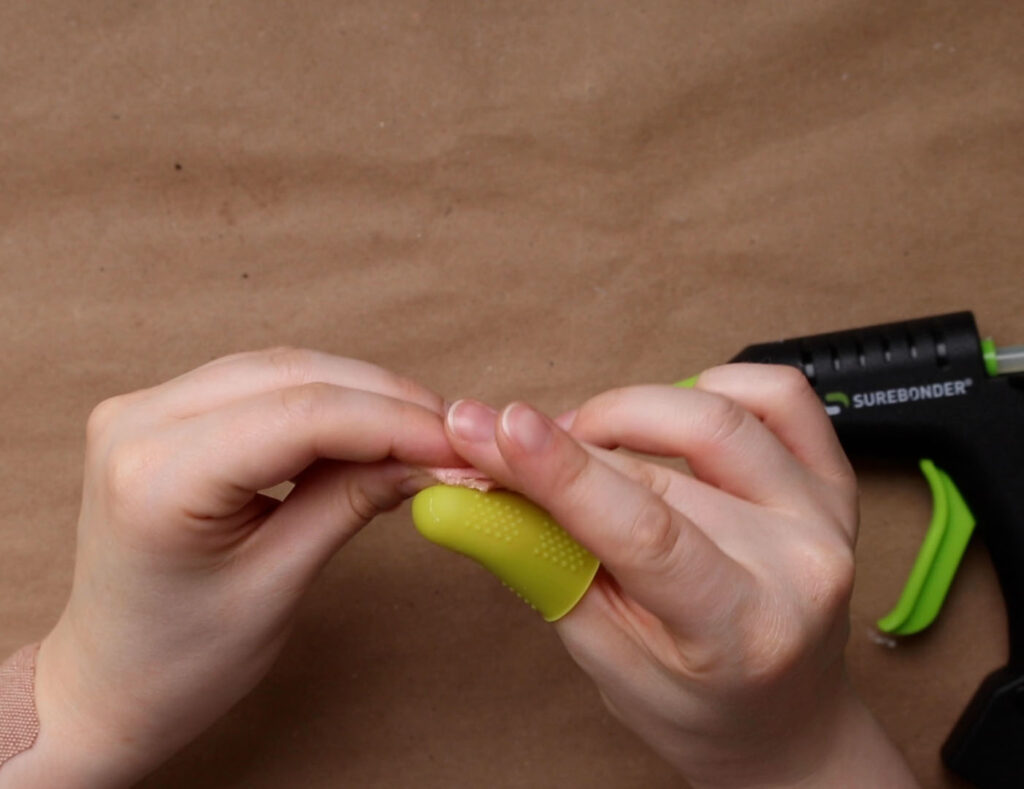
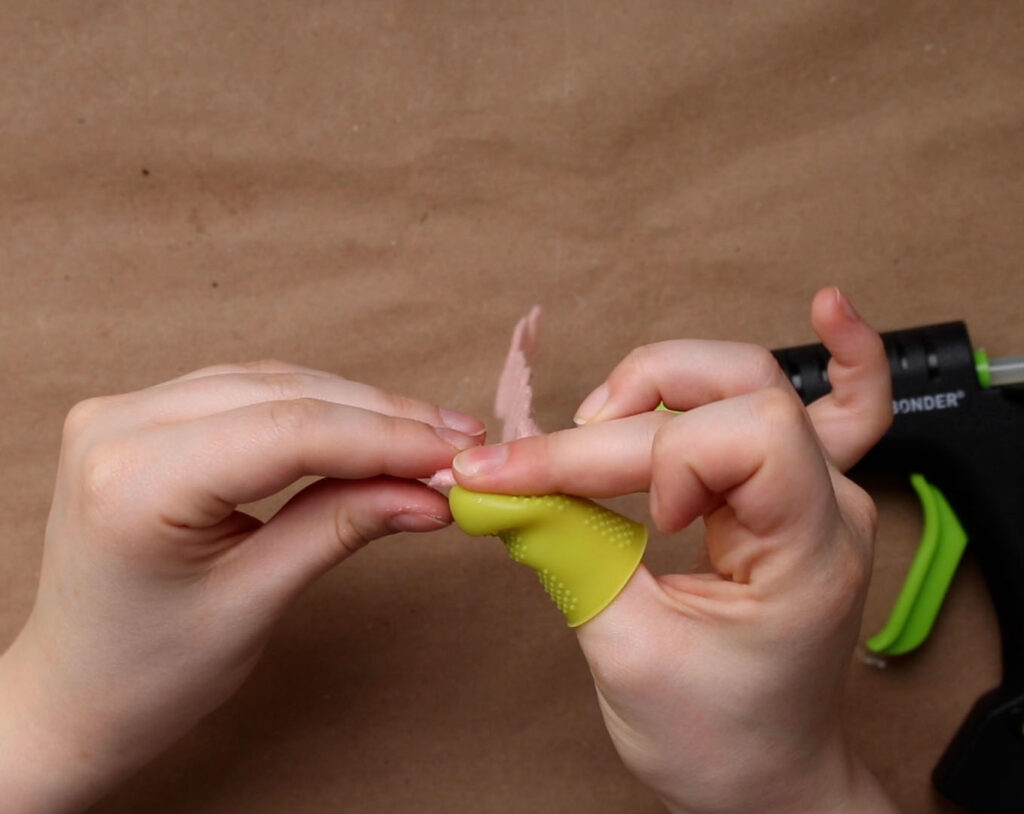
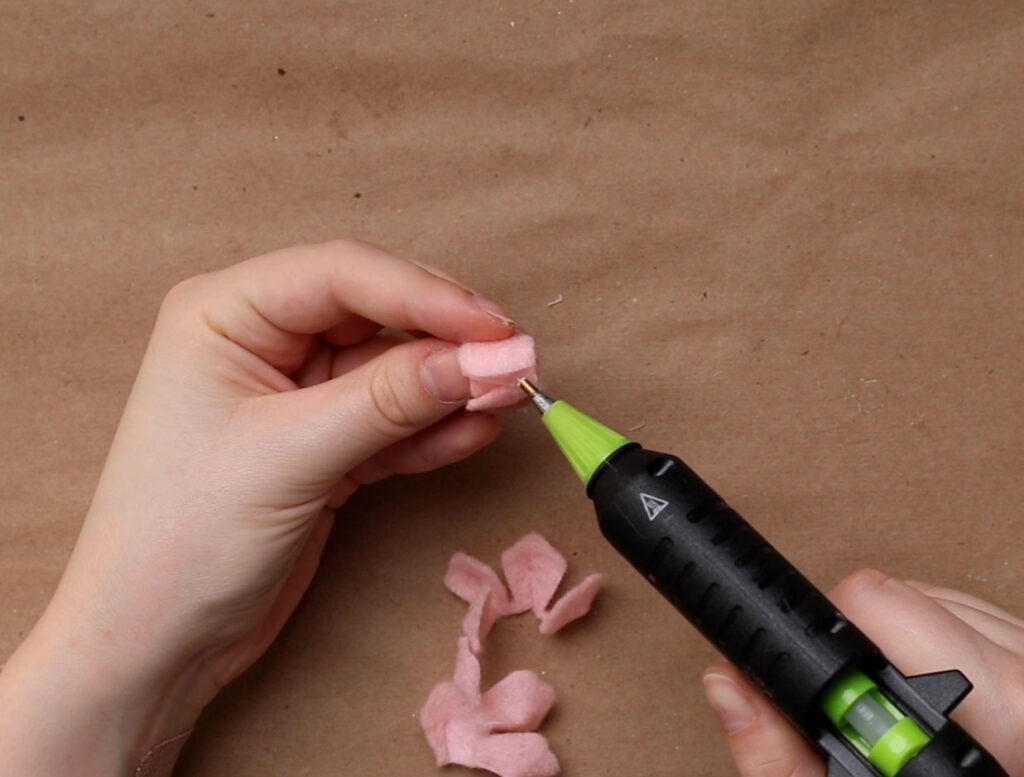
To create a curve in the petals, the sides of the cut triangle need to brought together. This can be sewn, but I’ve had good luck with using hot glue. This is when having the detail tip hot glue gun is super helpful. I apply a thin line of glue along one side of the center cut and then fold the petal so the center edges line up and then squeeze. Using silicone finger protectors will keep you from potentially burning your fingers. Keep in mind each petal should curve in the same direction. Don’t worry about the excess glue on the back yet. Repeat with each petal.
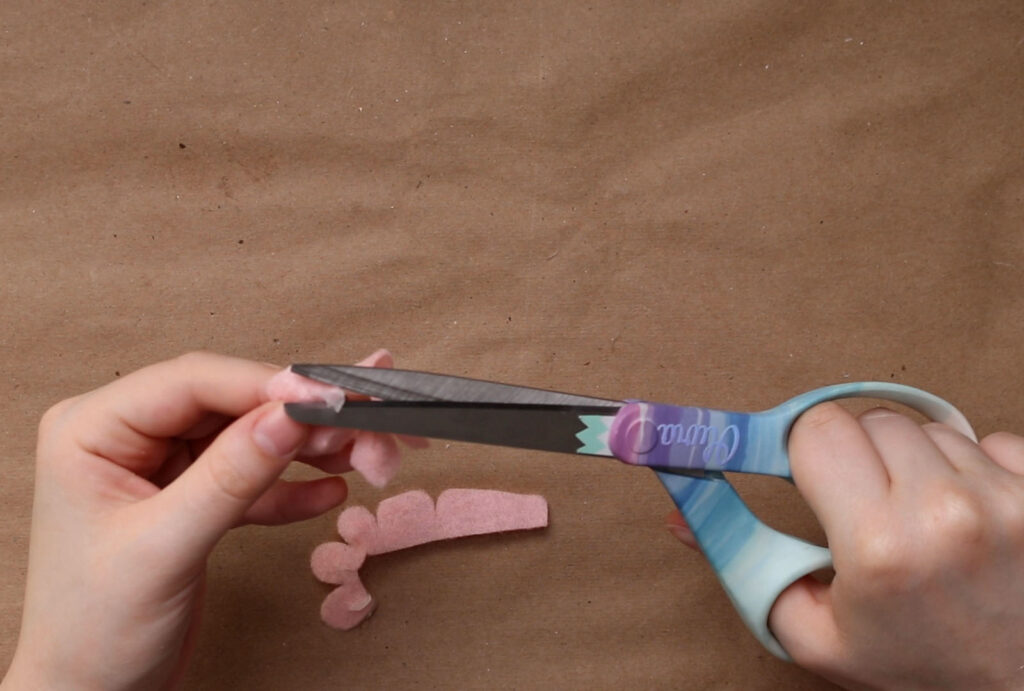
Now I go back and cut away the excess glue on the backs of the petals, you should end up with a neat little seam.
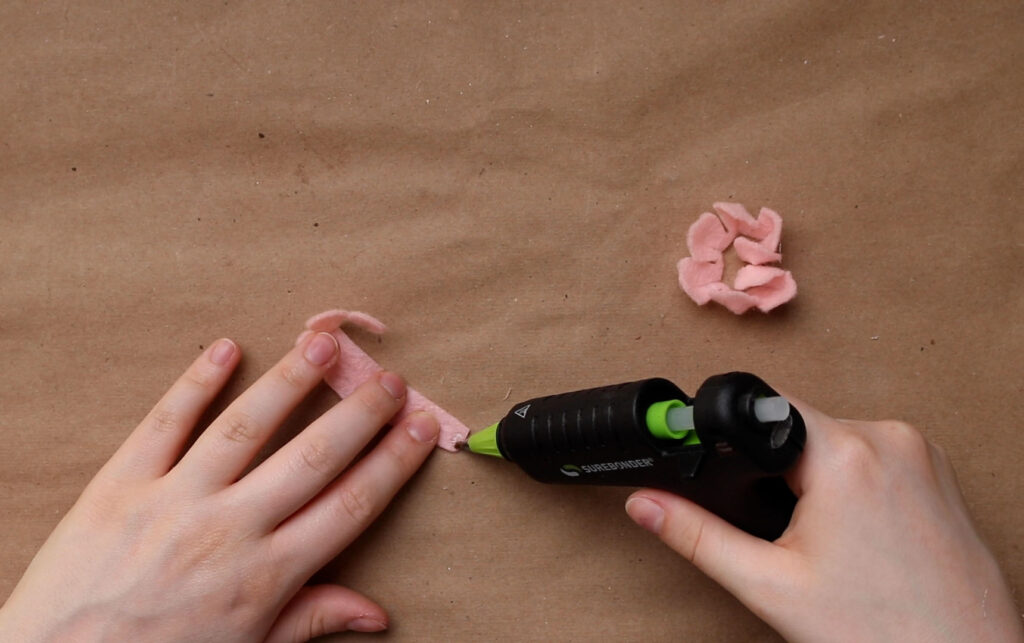
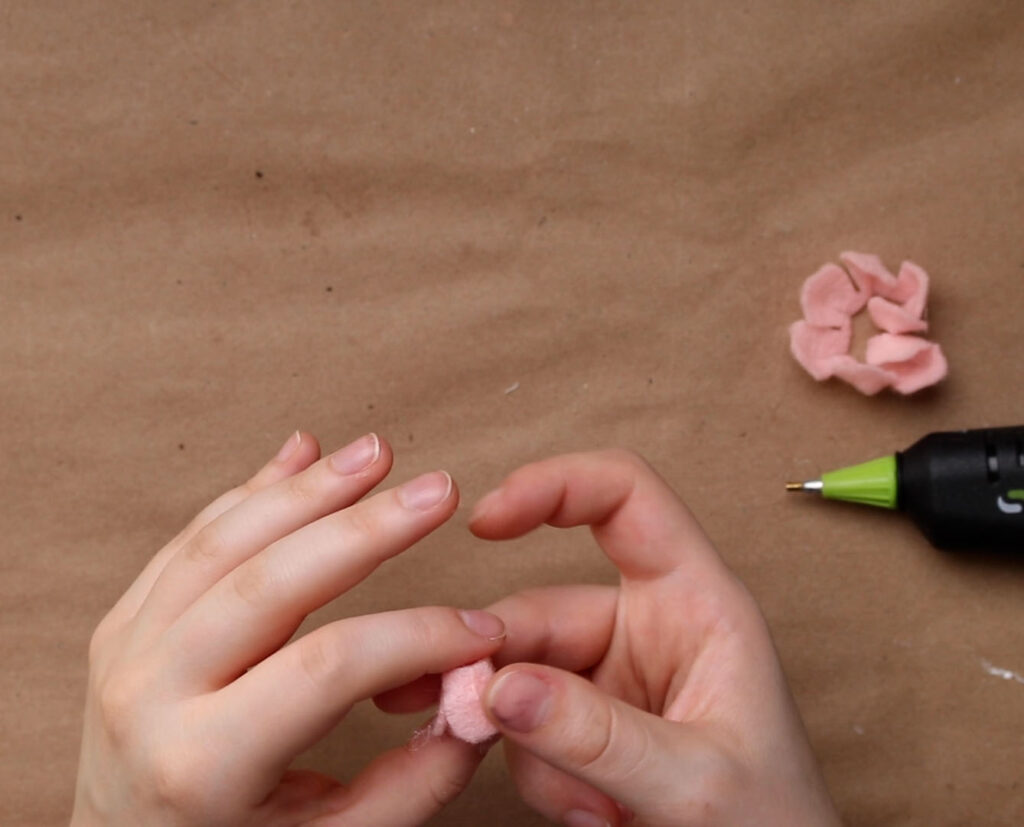
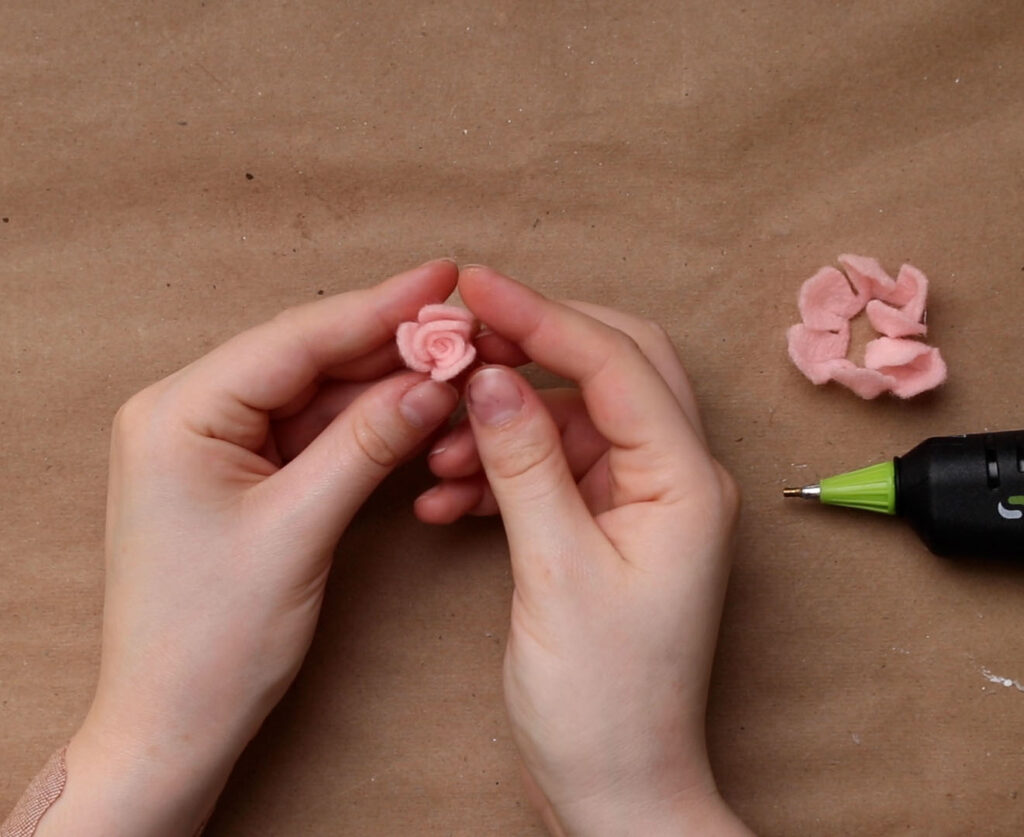
Start with the center flower piece. Start on the end that does not have the curved petals. Now start rolling it up, and add glue as you go. When rolling you want to keep the flat end straight.
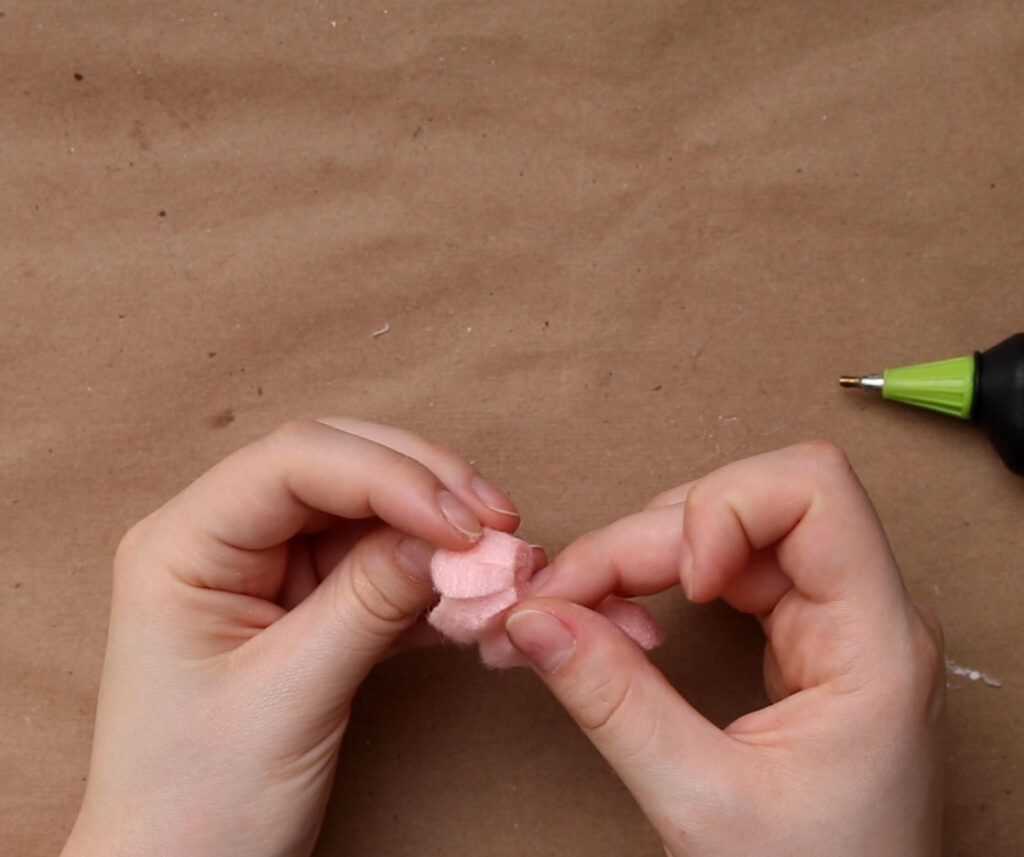

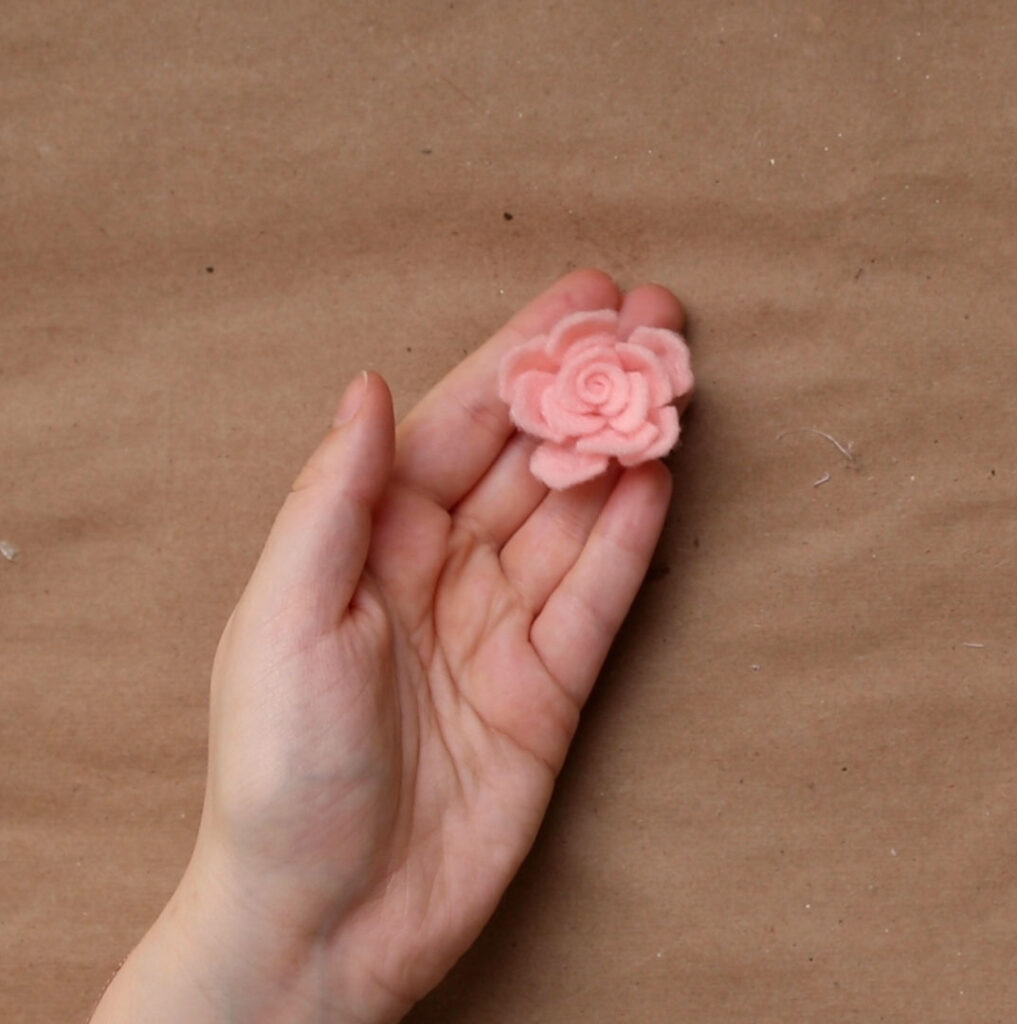
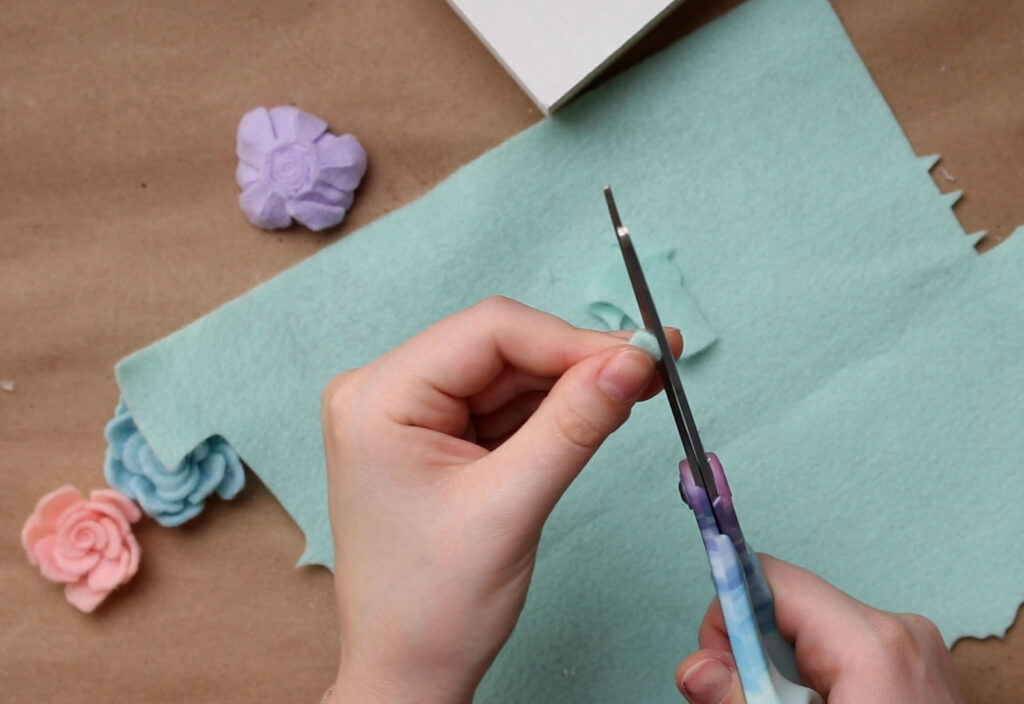
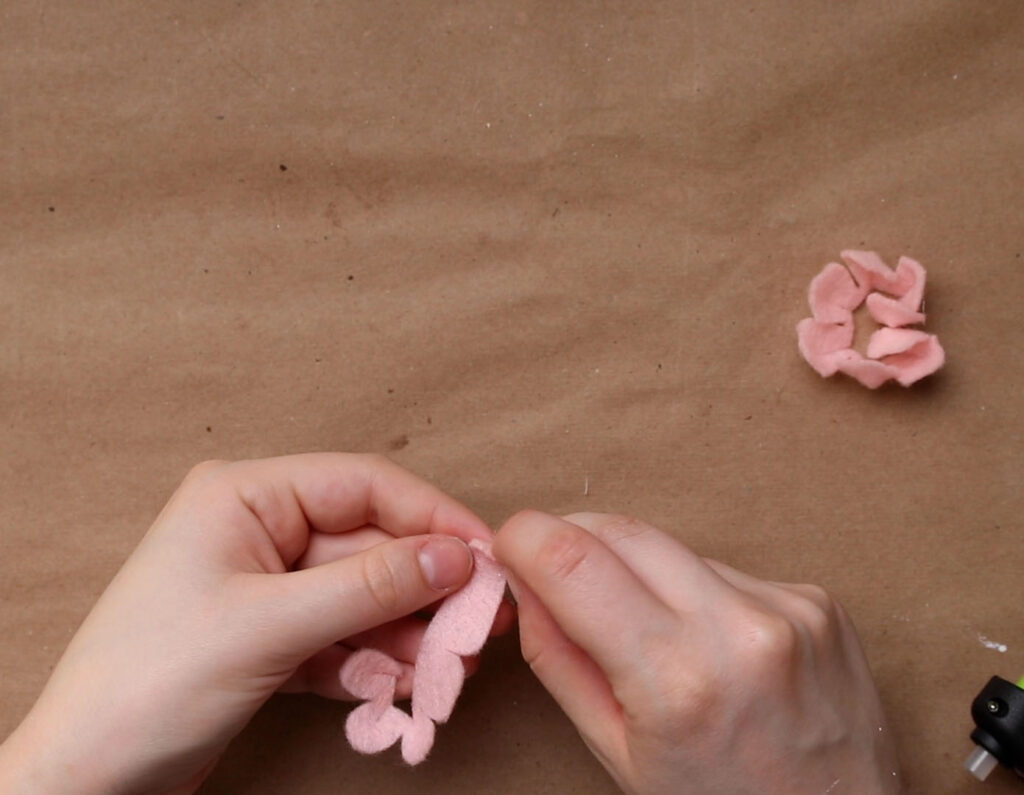
So now add on the outer strip of petals and keeping rolling and gluing until you reach the end. I also cut some little teardrop shapes out of a mint green to use as little leaves.

Kippi at Home // Salmonde // Olivia O’Hern // Zucchini Sisters
🐣 🐣 🐣 🐣 🐣 🐣

Feet Under My Table // The House on Silverado // Decorate and More with Tip

Natasha Mairs
Friday 9th of January 2026
These are just adorable! I would love it if you would come and share this at my new Serenity Saturday link party at www.serenityyou.com
Beth
Thursday 6th of January 2022
Super cute bunny couple! I'd love for you to share over at the Team Creative Crafts Linky Party https://creativelybeth.com/creative-crafts-linky-party-75/ Every Wednesday through Sunday. Have a great week Creatively, Beth
How to Make an Easter Bunny Garland | Bunnies and Carrots | Olivia OHern
Friday 19th of March 2021
[…] How to Make an Easy Easter Bunny Craft […]
Niky
Monday 15th of March 2021
This is so cute! The little felt flowers are the finishing touch! Pinned.
Niky @ The House on Silverado
Rebecca
Monday 15th of March 2021
Your bunnies are the cutest, Olivia! I love the pastel felt flowers! Thanks for sharing the great tutorial. Pinned! It was fun hopping with you :)